[ad_1]
If you own a treadmill, you knew this day would come — it’s time to figure out how to replace a treadmill belt. After countless miles logged on your two-ply belt, it’s perhaps becoming frayed, worn out, or off-center. Belt slips can happen on even the best treadmills, but with a couple of tools, our step-by-step guide, and a little bit of patience, you’ll soon be able to put “treadmill maintenance” on your resume and get back to your regularly scheduled runs.
This treadmill belt replacement guide is focused on electric treadmills — not manual ones — and while the process is similar for most models, you’ll still want to consult your user manual in addition to this walkthrough. Now, roll up your sleeves and keep reading to get a sense of how best to tackle this DIY project, from the required tools to knowing when it’s time to throw in the towel and call in professionals.
Preparing to Replace a Treadmill Belt
“You might think, ‘A treadmill is a treadmill,’ but this couldn’t be further from the truth. Well, of course, all treadmills ARE treadmills, but there are many different types of treadmills and factors to consider,” says our expert reviewer, Amanda Capritto. As such, the following steps may not apply to all treadmills, so you’ll want to consult your user manual before beginning your belt replacement. If you don’t have the user manual for your specific treadmill, take a look online to see if there’s a user manual on the interwebs — for example, many of the best NordicTrack treadmills have manuals which can be downloaded. (1)
Safety First
“A treadmill is a machine, and with any machine, there are safety risks,” says Capritto. Step 1 before you start tinkering with your machine is always to turn off and unplug your treadmill to avoid getting shocked or frying your electrical components.
Once you’ve made sure your treadmill is completely powered off and the safety key is removed, clear the area you’ll be working in to allow you enough room to work.
Tools and Materials
The most common tools needed to replace a treadmill belt are as follows:
- New treadmill belt (obviously)
- Phillips screwdriver
- Flat-head screwdriver
- Hex keys/Allen wrenches
- Wrench
- Pliers
- Marker or tape
- Belt lubricant (silicone based)
- Cloth for cleaning
- Vacuum cleaner
Tips Before You Dive In
Check your treadmill’s user manual to see if there are detailed instructions on how to replace your treadmill belt. If you’re left navigating these steps without a user manual, consider taking photos before and after each step you tackle. This can help you when it’s time to reassemble your machine. Remember that all of the pieces you take off your fitness equipment will have to go back on. For a quick rundown of what’s what on your machine, check out our treadmill parts guide.
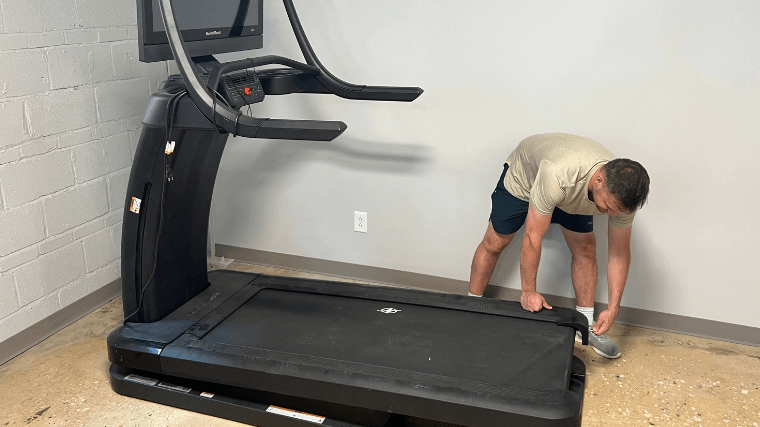
Removing the Old Treadmill Belt
Have your tools nearby, make some room, and grit your teeth — you can do this! And if you get halfway through and realize you can’t — or as I might say, “I don’t whanna” — you can always chalk up the effort to a learning experience and throw in the towel. While there are full videos online that detail the ins and outs of replacing an old treadmill belt, a call to your local treadmill repair company is always an option.

Remove Motor Cover
Grab a screwdriver and remove the screws that keep the motor hood secured to the belly pan. Once these screws are off, you should be able to pull the motor hood forward, which separates it from the walking platform.
Remove Right Foot Rail
Foot rails can be attached to your treadmill in a handful of ways.
- Sometimes the foot rail is attached with a screw located close to the motor cover.
- Some models have four or more screws that run down the side which you’ll need to remove.
- Check beneath the foot rail for bolts that may be holding it in place.
- For non-folding treadmills, you may need to tip the treadmill on its side to remove end caps.
- Use your Phillips screwdriver or wrench to remove the screw(s) and/or bolts, then slide the foot rail towards the back of the treadmill until it comes off.
If you have one of the best folding treadmills, you’ll want to fold the walking board up for this step. Once secured, proceed to remove the foot rail. Some models will require you to pop end caps off in this position. To do so, you’ll use a screwdriver to remove one or two screws which are securing these end caps.

You may need to remove the foot rail while the treadmill is folded vertically or once it’s lowered back to the ground. Regardless, after this step, you can lower your treadmill down and work on it from the ground from here on out.
If you hit a bump in the road and need some troubleshooting guidance, practice some meditation for athletes to calm your frazzled nerves and then check the foot rails for double-sided tape. If you discover that this is the culprit keeping the foot rail glued to the treadmill, take a knife and run it along the bottom side of the foot rail to cut your rail free.
Loosen Tension Bolts
The tension bolts are located on the backside of the treadmill. After locating these, use a wrench or hex key to loosen each one equally. This will reduce the tension on the belt
Remove the Rear Roller
Before you take the rear roller off, take a Sharpie or some tape and mark the left and right side of the roller. When it comes time to put the rollers back on, you want to replace this roller the same way it was removed to keep your treadmill running smoothly.

To take the rear roller off, continue loosening the tension bolts on both sides until you’re able to remove the rear roller easily.
Remove the Front Roller
Most often than not, you’ll need to remove the front roller to gain access to the running belt. Look around for screws and bolts that hold the front roller in place. Start by loosening these screws or bolts with a wrench or screwdriver, and if necessary, removing them.
Some treadmills will require you to take tension off of the drive belt to remove the front roller. The drive belt is what causes the front roller to turn when you have the treadmill running. To do this, loosen (but don’t remove) the anchor bolts on the treadmill motor mount.
These anchor bolts can be tough to get going, so you may want to insert your allen wrench and then twist it with a pair of pliers. Once loosened, insert your allen wrench into the tension mount and release tension on the drive belt.
Take That Belt Off
With the utmost care, slide the belt off of the deck and rollers. If it feels like you’re having to tug too much on the belt, try lifting the deck a little to help release the belt.
Clean Up and Inspection
This is your halfway mark — congratulations! But don’t rush to swap in a new belt just yet. Now that you’re gazing into the belly of the beast, you may be noticing some gunk, grime, and gore that’s accumulated under the hood. If you’re wondering how to clean treadmill belts, pull out your vacuum cleaner and grab a cloth, because all you need to do is suck up and wipe down any dust or debris you see.

Take your cloth and wipe down the deck and rollers, and eliminate any loose debris with your vacuum and a hose attachment. You’ll want a clean surface before you move on to your next step.
Installing the New Treadmill Belt
You can lay your old treadmill belt against your new treadmill belt to make sure you ordered the correct size — just be aware that your old belt may be a tad bit longer since they can stretch out with use.
Belt Placement
Slide your new belt onto the treadmill deck, taking time to make sure it feels centered.
Replace the Front Roller
If you took it off earlier, now it’s time to put it back on. Reattach the front roller with the belt looped over it. Replace any screws and bolts that hold the roller in place. You’ll also want to make sure you resecure the belt drive here as well. Make sure the drive belt lines up straight on the roller to avoid any squeaking once you’re up and running.
Replace the Rear Roller
Make sure to place the rear roller back in with the same orientation it had to begin with. If you removed any bolts from the roller, be sure to replace them.
Take your time here to make sure the hole on the roller lines up with the bolt, so you’re not cross-threading the bolt when tightening. These bolts should screw back in without too much force.
Belt Tension
The tension bolts are situated near the rear of the treadmill. Using a wrench or hex key, adjust these a quarter turn at a time, alternating from side to side to keep the adjustment symmetrical until the belt is snug but not too tight. A turn to the right should tighten, and a turn to the left should loosen this adjustment.
To find the right tension, you should be able to lift the belt about 3 or 4 inches off of the deck. For a more detailed look into creating the perfect fit, check out our guide on how to adjust a treadmill belt.
Belt Alignment
With your hand, rotate the rollers to check that the belt is centered. If the belt isn’t aligned, make small adjustments to one tension bolt at a time, checking with each adjustment how it affects how the belt moves on the rollers.
Almost Done!
Once you’re satisfied with the belt alignment, you’re ready to put all the pieces back together and test out your hard work.
Put the Motor Cover Back On
Reattach the motor hood using the screws you previously removed. Don’t overtighten these screws, since you may want to pop back in to make some additional adjustments after a test run.
Test It Out
Go ahead and plug the treadmill back in and slot in the safety key. Turn the treadmill on and, without hopping on the belt, turn the speed to its slowest setting. Observe how the belt runs. If everything looks smooth and centered, you’re all set!

Don’t despair if you find you need to go back in and make additional adjustments. If the belt isn’t running the way you had hoped — it’s too loose or shifting from side to side — take the motor cover off and play around with the belt tension again. If your rear roller isn’t level, the belt can shift to a side and rub on your drive pulley or the sides of your frame and cause damage to your new treadmill walking belt.
Belt Lubrication
Now that you’re happy with the alignment of your new treadmill belt, it’s time to add some lube (if needed). While it’s best to follow the manufacturer’s instructions, here are the general steps for how to lubricate a treadmill.
- Unplug your power cord and power off your treadmill.
- Lift the belt gently on one side, creating a gap between the belt and the deck.
- Apply a thin strip of lubrication to the underside of the belt, starting and stopping about 6 inches from the front and end of the deck.
- Repeat on the other side.
- If using spray lubrication, spray under the belt onto the center of the deck, moving from the front of the treadmill to the back.
- Lower the belt back onto the lubed-up deck.
- With your hands, manually push the belt so that the lubrication spreads out across the deck beneath. You can also run your treadmill at a low speed for a few minutes (without you on top of it), to help spread out the lubrication.
To help prolong the lifespan of your running belt, it’s a good idea to lubricate your deck every three months or around every 130 miles. See our roundup of the best treadmill lubricants to help you get started.
Final Word
“Gym equipment manufacturers have recognized the trend toward home fitness and in response have produced higher-quality home treadmills than we might’ve seen five or 10 years ago,” says Amanda Capritto, our expert reviewer. This rise in home use also means that brands have become more aware about the needs of their customers when it comes to treadmill maintenance.
While we’ve laid out the basics of how to replace a treadmill belt, you’ll also find a variety of online videos, manuals, and guides to help you tackle this chore. If your treadmill belt has seen better days, consider referencing this step-by-step guide to help you give your equipment the glow-up it deserves. Once your new belt is on, you’ll be back to your regular treadmill workouts in no time.
FAQs: How to Replace a Treadmill Belt
Can you replace a treadmill belt by yourself?
Yes! Replacing a treadmill belt shouldn’t take too much effort. While you won’t need an extra pair of hands, it’s best to come prepared with the tools you’ll need, the user manual, and a little bit of patience.
How much does it cost to replace a treadmill belt?
If you’ve perused the requirements and steps needed to replace your treadmill belt and would rather hire someone else to undertake the task, you can expect to pay between $200 and $400 for labor and materials.
How do I know if I need to replace my treadmill belt?
You’ll want to do a visual inspection of your belt to check for rips, split seams, and curled or fraying edges. If you’re unsure how old the belt is, you can also do a visual check beneath to see how much build up there is. A new treadmill belt’s underside will be white, and an older and more worn-out belt will often be brown and dirty.
References
- NordicTrack user manuals download. (n.d.). NordicTrack. https://nordictrack.manymanuals.com/
[ad_2]
Source link