Timms took the victory to advance to the 2024 Olympia.
Last updated on June 10th, 2024
Robert Timms is the 2024 Oklahoma Pro Classic Physique show champion. Timms was one of 15 competitors who stood onstage in Tulsa, OK, on Saturday, June 8, 2024.
Due to this victory, Timms qualified for the 2024 Classic Physique Olympia, which will be held on Oct. 10-13, 2024, in Las Vegas, NV. That contest is part of the 60th Olympia Weekend.
Lamar Shaw and Matt Orchard took second and third place, respectively. The final standings for all 15 athletes are below.
The prejudging round was the only one scored in this competition. Timms received a perfect score from the judges. This is his fifth pro victory and the first since the 2021 Texas Pro. Timms can now make his fifth Olympia appearance since turning pro in 2016.
Second Place — Lamar Shaw
Shaw was already qualified for the Olympia thanks to his victory at the 2024 Mid-USA Pro in Albuquerque, NM, on June 1, 2024. Despite his runner-up finish at this competition, his Olympia qualification remains secured.
Third Place — Matt Orchard
The closest battle of the top contenders was between Orchard and fourth-place finisher Adam Thomas. The judges separated them by a single point. It was Orchard’s fourth contest of the 2024 season, resulting in his highest ranking thus far in his rookie campaign in the pro ranks.
Other Notes
This was one of three Classic Physique shows this weekend. Niall Darwin placed first at the 2024 Toronto Pro Supershow, and Abdullah Al-Safari was the 2024 Sheru Classic Pro champion. They both qualified for the 2024 Olympia.
With robust incline ranges, cushioned belt decks, and iFIT integration, the best NordicTrack treadmills tend to be complex pieces of fitness equipment. Oftentimes, regular maintenance can help prevent major issues and expensive repairs, but how can you know when to call for help? Whether the belt is off-center or the motor is emanating frightening noises and smells, our team has advice and recommendations you’re looking for to get your treadmill back in gear.
NordicTrack treadmills are some of the BarBend team’s all-time favorites and we have been assembling, using, and maintaining these high-end machines for years. If you think you smell something burning, feel your belt slipping, or are tired of screaming at your blank touchscreen, you’ve come to the right place. Read on to learn more about how to fix a NordicTrack Treadmill.
About Our Expert
This article has been reviewed by Amanda Capritto, CPT, CES, CNC, CF-L1, CSNC, a certified personal trainer and CrossFit Level-1 instructor. She reviewed the research we cite to help ensure we’re providing helpful, accurate descriptions and recommendations.
Troubleshooting Common Treadmill Problems
Before you send up the NordicTrack bat signal, double check that there isn’t an outside issue causing your treadmill to malfunction. Ensure that it’s plugged in, a circuit breaker hasn’t been tripped, or there isn’t a kid’s toy jammed underneath. As with any brand of fitness equipment, problems can arise from time to time. However, as our expert reviewer, Amanda Capritto says, NordicTrack’s machines and warranties are some of the best out there.
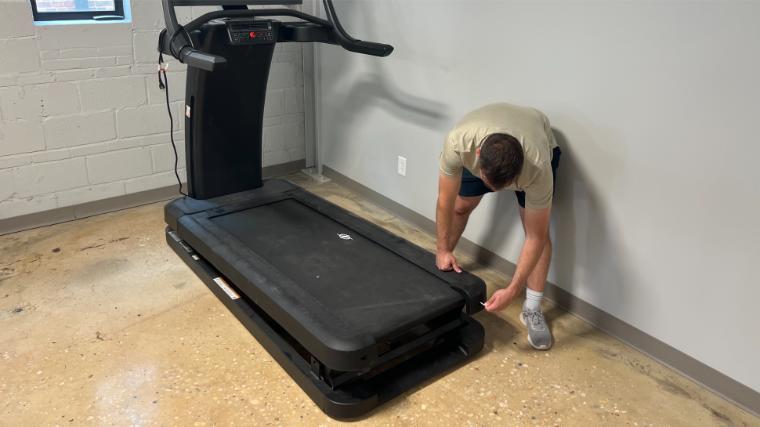
Our tester adjusting the belt of the NordicTrack x32i Treadmill.
“With NordicTrack, you’re buying a household name (at least in the fitness world),” Capritto says. “NordicTrack offers industry-leading specifications on their treadmills as well as industry-standard warranties (10 years frame, two-years parts, one-year labor). You’re buying into a brand that has served tens of thousands of customers and remains a reputable brand.”
Before you go digging around in the wiring, consider whether one of these simple fixes can get your belt spinning again.
Power Source: Take a look at the outlet to see if it has come unplugged. You can also try plugging in another device to see if there is an issue with the outlet itself.
Safety Key: Without the safety key secured, your treadmill won’t turn on. Be sure it hasn’t been dislodged and is properly inserted.
Circuit Breaker: Even if there’s power in the rest of your home, it’s possible the breaker for that area has been tripped. Open up the circuit breaker and make sure all breakers are in the “on” position.
Power Switch: Classic. Make sure the power switch or button is in the “on” position.
Consult Manual: Dig out or download your model’s user manual to see if there are specific instructions regarding starting issues.
Slipping Belt
In addition to interrupting your run, a slipping belt can be dangerous. Thankfully, learning how to adjust a treadmill belt is a relatively easy task that can help you avoid major issues and costly repairs.
Our tester adjusting the tension of the belt on the NordicTrack x32i Treadmill.
If you notice any irregular movement during a workout, here are a few possible remedies you can try yourself.
Tension: At the rear of your NordicTrack treadmill, you’ll find a screw on each side that allows you to adjust the walking belt’s tension. You’ll most likely need an Allen wrench or hex key. Complete quarter turns, alternating between each side to make sure they’re adjusted equally.
Lubrication: A slipping belt could also be a sign that it needs lubrication. Check your model’s user manual for detailed instructions on how to apply lubricant.
Alignment: Make sure your belt is properly aligned and centered on the deck.
Wear and Tear: It’s possible that your belt may be the victim of good ol’ fashioned wear and tear. If the above adjustments don’t remedy the slippage, check your warranty information to see if you can get a replacement belt.
Erratic Speed
Inconsistent or unpredictable changes in speed may be an indication of more serious issues. These are a few areas to check.
Belt: Your first move should be to check the belt tension and lubrication, along with inspecting it for signs of wear. Misalignment or improper tension in the belt can affect its performance. If you find the belt deck to be a little dry, grabbing one of the best treadmills lubricants might be a quick and easy solution.
Motor: After ensuring the belt is in order, check the motor. Consult your specific NordicTrack treadmill’s user manual to troubleshoot common issues. Given the complexity of motor function and repair, you may need to call in a professional.
Speed Sensor: Use your user manual to locate the speed sensor and clean off any dust or debris.
Power Supply: It’s possible that the power cord itself could be the issue, so check that it’s working properly.
Software Update: Outdated software could be the cause of your inconsistent speed. Check to see if your machine is due for any updates.
Malfunctioning Treadmill Console
If your console is unresponsive or not functioning properly, here are some potential solutions.
Restart: Completely power off your treadmill and wait several minutes. Turn it back on and check the console.
Inspect Cables: Check that all cables are undamaged and properly connected.
Software Update: Ensure your treadmill is running the latest version by checking the NordicTrack website.
Clean and Reset: Use a wipe or cloth to gently clean the console, then consult your user manual to find instructions for resetting the console.
Consult Manual: Double check your model’s user manual for any information or contact NordicTrack customer support for help.
iFIT integration comes standard on both NordicTrack and ProForm treadmills. Given the additional monthly cost, issues with the iFIT app can be particularly frustrating. If you’re having trouble with your NordicTrack treadmill’s programming, there are a few things you can check.
Wi-Fi Router: Unplug your router, wait around 15 to 20 seconds, then plug it back in. Try to reconnect to your network on the console.
Software Update: To keep iFIT functioning properly, your treadmill may need a software update. Make sure you are up to date by checking NordicTrack’s website.
Factory Reset: Consult your user’s manual and follow the steps to reset your treadmill.
Burning Smell
If you notice a burning smell during use, immediately end your workout and power off the machine. That smell may indicate one of the larger problems listed below.
Overheating motor
Belt deck friction
Buildup of dust or debris
Mechanical or electrical issues
Exceeding the weight limit
DIY Treadmill Repair
While more serious problems may require calling a technician, our expert reviewer Amanda Capritto reminds us that there are easy steps you can take to keep your treadmill running.
Our tester working on the NordicTrack x32i Treadmill.
“Machines require maintenance, such as cleaning and lubrication,” she says. Before tracking down a professional for a house call, check out these simple steps that may address the issues with your NordicTrack equipment.
Check the Power Source
Your first step should always be to ensure your treadmill is properly connected to its power supply. Make sure your power cord is in good shape and securely plugged into an outlet. If you use an extension cord or surge protector, ensure those are in working order, as well. That said, we highly recommend plugging a treadmill into a wall outlet and not a power strip.
Lubricate Treadmill Belt
For NordicTrack treadmill owners, learning how to lubricate a treadmill belt is a simple skill that can prevent serious issues. Not only will it keep your machine operating safely, but it can also extend its lifespan, saving you money on repairs or replacement.
Adjust Treadmill Belt
A quick check of your belt’s tension and alignment may prove to be the cause of common treadmill issues. Ensuring proper calibration can help prevent slipping and hesitation, along with extending the life of the belt.
Factory Reset
When you have exhausted all simple remedies, a factory reset may be in order. You can follow these steps to complete a factory reset on most NordicTrack treadmills, but first consult your specific model’s user manual. Keep in mind that performing a factory reset should be considered a last resort, as you may lose any stored data.
Locate the treadmill’s power source and turn it off.
Find the pinhole on the treadmill’s console. This is usually found on the side or the back of your console. Consult your user’s manual if you are unable to locate it.
Insert a paperclip into the hole, then press and hold the button while turning the power back on. This may require another set of hands.
Remove the paper clip as soon as the console turns on. You should see the iFIT logo appear on your touchscreen with a message indicating a “system recovery.” It may take over 30 minutes to complete the reset.
If the factory reset was successful, you will be prompted to connect to WiFi.
Your treadmill should then automatically run the latest software update.
When to Call a Professional
“Treadmills are generally tech-heavy, complex machines,” says BarBend expert reviewer Amanda Capritto, so there’s no shame in calling in a professional to lend a hand. Always check your machine’s warranty before you call an outside technician. You can also visit NordicTrack’s contact us page, or call them directly at 1-888-308-9616.
Faulty Treadmill Motor
With rotors, bearings, commutators, shafts, windings, and a host of other moving parts — including separate incline motors — repairing a faulty treadmill motor may be outside of most user’s wheelhouses.
If you’ve worked through the troubleshooting tips above and are still running into issues, you may have a malfunctioning motor or motor control board, which requires professional consultation. First, check your warranty and follow the steps for submitting a claim before enlisting a third-party repair professional.
Electrical Issues
Not only are the wires, chips, and circuits in your treadmill’s control board complex, it may be dangerous to attempt electrical repairs without proper training. If you suspect an electrical issue, consult your warranty for guidance.
Persistent Burning Smell
An important part of learning how to clean treadmills is knowing where dirt, hair, or debris can accumulate. If a burning smell still lingers after removing these obstructions — especially from the motor and belt deck — consider calling a professional to diagnose the root cause.
Our tester wiping the side rails of the NordicTrack x32i Treadmill.
Check your treadmill’s warranty for guidance, but a persistent burning smell may be an indication of serious or dangerous issues.
Preventative Maintenance
Like changing the oil in your car, a regular maintenance schedule for exercise equipment like treadmills, ellipticals, and exercise bikes can stop major issues before they start. Not only can these simple steps ensure your NordicTrack treadmill is operating safely, it can extend its lifespan.
Our tester cleaning the console of the NordicTrack x32i Treadmill.
As always, consult your user manual and warranty for specific guidance on maintaining your machine. Doing so can prevent complex and expensive problems in the future. Take a look at our general recommendations for treadmill maintenance below.
Daily/Weekly
Wipe exterior surfaces, including the handrails, frame, and consoleVacuum your treadmill mat, along with the areas around and underneath the treadmill
Bi-Monthly
Inspect the belt for general wear and tearEnsure proper belt alignment and tensionRemove dirt, debris, and other build up from motorLubricate the area between the belt and the deck with silicone lubricant
Annual
Inspect rollers, bearings, and other hardwareCheck your power cord, connection points, electrical components (may require professional consultation)
Final Word
While it may be easy to write off a frozen iFIT workout, slipping belt, or slight burning smell, these minor annoyances could be indicative of major looming issues with your NordicTrack treadmill. Many common problems can be resolved with a little DIY knowhow or preventative maintenance. However, with so many moving parts and technology onboard these top-of-the-line treadmills, a repair may turn out to require the trained eye of a professional technician.
After consulting your model’s user manual and warranty, check out our tips to see if you can avoid an expensive repair. Getting your treadmill back in working order may require some assistance, but if you’re wondering how to fix a NordicTrack treadmill, our experienced team has a few troubleshooting tips.
How To Fix a NordicTrack Treadmill FAQs
Why is my NordicTrack treadmill not working?
Along with being some of the best home gym equipment money can buy, NordicTrack treadmills are complex machines. Yours may not be working properly for many reasons. It could be a minor issue you can fix yourself, like a misaligned running belt or out-of-date software. However, a more serious issue like a malfunctioning motor could be the culprit. Consult your owner’s manual and warranty for guidance, but you can always reach out to NordicTrack’s customer care team.
How much does it cost to repair a NordicTrack treadmill?
Depending on the issue, your repair could cost as little as a bottle of treadmill lubricant. For major repairs and replacement parts, however, the cost will likely be a few hundred dollars or more. Consult your warranty and reach out to NordicTrack’s customer support for more information.
How to get a NordicTrack treadmill fixed?
After checking for the common issues that we laid out above, take a look at your treadmill’s model number and warranty for steps to submit a claim. You can always reach out to NordicTrack’s customer service team for additional guidance.
What is the life expectancy of a NordicTrack treadmill?
In general, quality treadmills can last anywhere from 5 to 12 years, depending on their workload. NordicTrack manufactures some of the best treadmills on the market and are known for their durability and longevity. With proper care and maintenance, they should last for many years.
We receive free products and receive commissions through our links. See disclosures page.
While certified kids have known about the benefits of the best jump ropes for years, certified CrossFit grown-ups are increasingly wising up to the cardio and coordination these simple pieces of equipment offer up. Whether you want to start practicing singles and crossovers or beat your box’s highest double-under PR, the best CrossFit jump ropes are designed to improve your coordination, cardiovascular health, and muscular power. (1)(2)
After spinning over 30 jump ropes, our team of CrossFit coaches and personal trainers handpicked their go-to ropes, along with new favorites to match a wide variety of experience levels and budgets. We think these options are ideal for newbies and seasoned CrossFitters looking to improve both their technique and their overall fitness. Check out our list of the best CrossFit jump ropes to see if one of our faves can earn a spot in your gym bag.
The 7 Best CrossFit Jump Ropes of 2024
About Our Expert
This article has been reviewed by Kate Meier, NASM-CPT, USAW-L1, CF-L1, a personal trainer, CrossFit Level-1 coach, and gym owner. Along with personally using several of these CrossFit jump ropes, she reviewed the research we cite to help ensure we’re providing helpful, accurate descriptions and recommendations.
How We Tested and Chose the Best CrossFit Jump Ropes
The BarBend roster of fitness professionals is stacked with CrossFit coaches, certified personal trainers, and gym owners who know the ins and outs of the CrossFit community. We’ve tested over 30 jump ropes to see which weights, grips, and materials can help you dominate your next WOD.
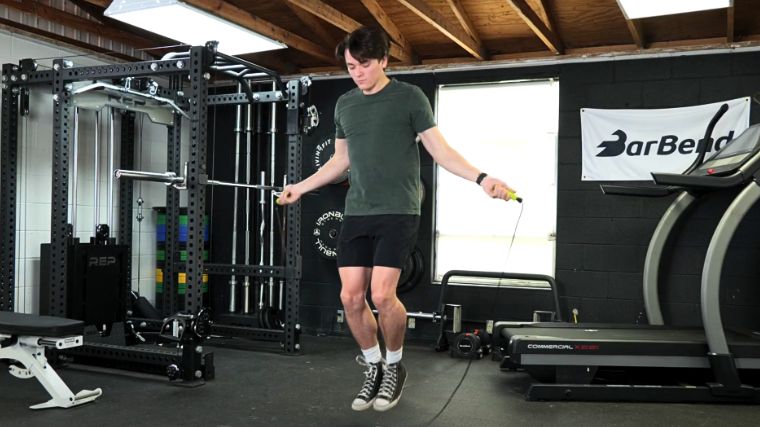
Jake Herod jumping rope in the BarBend gym.
After setting a few PRs ourselves, we assigned ratings of 1 (lowest) to 5 (highest) across 13 categories, from sizing and adjustment to handle material and rotation system. Read on to see which options made the cut for the best CrossFit jump ropes. For information about how we test products, check out BarBend’s equipment testing methodology.
Cable Sizing and Adjustment: For every rope we got our hands on, we noted how easy or difficult it was to adjust the length of the cable. Some options use the common “size-and-cut” method, while others utilize systems that allow users of different heights to adjust the length of the cable.
Handle Grip: As your only point of contact with the jump rope, the grip is vital. We included ropes with contoured rubber designs, as well as knurled aluminum and the classic plastic shell.
Cable Weight: The picks on our list range from lightweight, speedy cables to heavier, slower ropes. While experienced CrossFitters may need a faster spin to set a new double-under PR, newcomers may want to hone their technique with a heavy cable.
Rotation Mechanism: Most CrossFit jump ropes utilize either a ball bearing or bushing rotation system. Ball bearings allow smooth, 360-degree rotation, but tend to be more expensive. While a bushing system’s range is limited, these ropes are typically more affordable.
Packability: Whether you’re taking your jump rope on the road or just to and from your CrossFit box, they can easily become tangled if they are stuffed in a gym bag or the trunk of your car. We prioritized ropes that come with their own travel cases or easily coil without tangling.
Its thin cables can become warped without proper care
The tiny adjustment screws are difficult to tighten and loosen
Should only be used on indoor and non-abrasive surfaces
If you’re looking for a jump rope to help you master the classic CrossFit double-under (or, heck, even a single-under), we think the Rogue SR-2 3.0 has everything you need. Between the knurling on the aluminum handles and its smooth, quick rotation, it easily earned its place among the best CrossFit equipment we’ve used. Our tester — a CrossFit Level-1 trainer — even used this rope to set a new PR. “New PR! After trying out multiple other ropes, this is the one that got me to 137 dubs,” they said, rating both its handle and knurling material a 5 out of 5.
With an overall weight of just 0.35 pounds and a high-speed bearing rotation system, this rope quickly earned the affection of our tester after they started using it at their box. “Even as a trainer, I never paid much attention to the rotation system on ropes like this,” they noted, rating the system on the SR-2 3.0 a 5 out of 5. “But the bearing rotation system lets it spin seamlessly in every direction.”
Another of our testers —a certified personal trainer — also felt that this is a solid option for newbies. “This is the rope I used when I learned how to do double-unders, so I think it would be good for new CrossFitters, too,” they said. At just under $50, it lands just at the bottom of the average range of $50 to $100 for CrossFit jump ropes, which may make it a bit more palatable for newcomers.
It earned a 4 out of 5 for value, though our tester admitted those unfamiliar with CrossFit may balk at the price. “It will probably seem expensive to anyone unfamiliar with these types of ropes,” they said. “But it helped a certified CrossFit coach hit their PR, so I am sold.”
Make sure that you either take it to your CrossFit box — or that your space is outfitted with one of the best home gym flooring options, like rubber or turf. Ropes like these are typically recommended for indoor use, so it only scored a 3 out of 5 for outdoor use. “If you use it on concrete or asphalt, the cable will start to rip apart,” said our tester.
Best High-End CrossFit Jump Rope: RX Smart Gear EVO G2
RX Smart Gear EVO G2
The ergonomic aerospace-grade aluminum handles on the EVO G2 feature a unique “pinch point” silhouette with diamond-pattern knurling. Its dual-bearing swivel rotation system also enables incredibly smooth rotation.
Specs
Price: $165
Product Weight: 1.3, 1.8, 2.6, 3.4oz.
Handle Length: 6”
Cable Length: 7’10” to 9’4”
Pros
Ergonomic aerospace-grade aluminum handles
Unique “pinch point” silhouette with diamond-pattern knurling
Dual-bearing swivel rotation system is incredibly smooth
Cons
At $165, it far exceeds the average range for CrossFit ropes — $50 to $100
Should only be used on indoor and non-abrasive surfaces
High-end. Luxury. Bougie. These were a few of the words thrown around by our testers when they laid eyes on the RX Smart Gear EVO G2. But by the end of our workouts, even our most experienced gear junkies, like certified CrossFit Level-1 trainer and BarBend editorial member Kate Meier, were head over heels. “When I saw the price tag, I wanted to hate on this rope so much,” she admitted. “But during my first reps I actually said, ‘Wowww,’ out loud. The instant it started spinning, I could tell I was going to love it.”
It’s probably no wonder that she scored it at least a 4 out of 5 in 11 of 13 categories, including a 4.5 for her overall workout experience. “You can tell just how much attention to detail they put into this rope,” she said, wishing she had gone with a lighter option. “I only knocked it a half point because I tend to prefer really thin speed ropes.” The 2.6-ounce version of the EVO G2 that Meier used is one of four available weights: 1.3, 1.8, 2.6, and 3.4 ounces.
For another of our testers (a certified personal trainer), the unique design of the handle was what most set it apart from other (more affordable) CrossFit jump ropes. “I absolutely loved this design. Each of the three notches has raised rings, then between the notches are sections of knurling,” she explained. “Holding the handle at the bottom let me spin it faster. With knurling between each notch, I could hold it all the way at the end and still have some to pinch.”
The biggest and most obvious drawback among our testers was the price, which was the culprit behind its 3 out of 5 rating for value. “For $165, you could get so much home gym equipment, but I’ll be the first to admit it’s an incredible rope,” Meier said.
Best CrossFit Jump Rope for Speed: RPM Comp 4
RPM Comp4
Need a quick, efficient jump rope for your next workout? The RPM Comp4 features a lightweight cable-style rope for fast rotations, and the Dual-Axis Rotation technology eliminates potential torque at the handles for seamless turnover no matter your training intensity.
Specs
Price: $70
Product Weight: 0.27lbs
Handle Length: 5.5”
Cable Length: 10’; size and cut
Pros
Dual-axis rotation system creates incredible speed
Aggressive knurling along entire handle for grip
Comes with its own travel case
Cons
The 5.5-inch handles may be small for some users
Length adjustment screws are tiny
Misjumps may hurt or leave small welts
Like Lightning McQueen, the RPM Comp 4 was built for speed. The dual-axis rotation system is engineered to eliminate any “slop” (RPM’s word, not ours) in the system, meaning that it can avoid twisting and torque build-up in your cable. Speaking of it, the 12-foot bare cable is one of the fastest we’ve tested, making it ideal for jumpers interested in high-intensity work.
“If you’re new to jump ropes in general, I would not start out with a speed rope like this. You’ll definitely be whipping yourself and end up with welts — just like I did,” said our tester (a certified personal trainer). A big part of that speed is the dual-bearing rotation system that earned a 5 out of 5 from our tester. “The dual-axis rotation in the handles generates a ton of speed and opens up training like HIIT cardio workouts. The bushing system is well-oiled, which again, just makes it even faster.”
With a bare cable flying this fast, we don’t think this rope is suited for double-under rookies. After earning a few welts of their own, our tester highlighted who this speed jump rope is geared towards. “This rope is totally not for anyone learning double-unders,” they noted. “It’s definitely better for people who are already proficient in stuff like crossovers, double-unders, or triple-unders who want to get even faster.”
Another of our testers — also a certified personal trainer — rated the grip in the handles a 5 out of 5, saying, “I loved the full-length aggressive knurling and even with sweaty hands had zero issue.” However, issues did soon arise for this tester. “I don’t know what happened, but this rope was an absolute dream before it broke on me,” they said. “After five sessions, one of the ball bearings popped out.”
After struggling with the tiny adjustment screws, our tester walked away feeling they may have been cursed by the jump rope gods. “I so badly want to give this rope a high rating, but getting these little bitty screws in was extremely frustrating.”
Best CrossFit Jump Rope for Learning Double-Unders: CrossRope Get Lean Jump Rope Set
CrossRope Get Lean Jump Rope Set
CrossRope Get Lean Jump Rope Set
This heavy rope provides the feedback needed when learning double-unders. Its ceramic ball bearings create smooth rotation, plus the connected app offers metrics tracking and jump rope workouts. If you’re not satisfied, you can return your jump rope within 60 days — no questions asked.
Specs
Price: $129 to $149
Product Weight: 0.25
Handle Length: Unlisted
Cable Length: 7’0” to 9’6”
Pros
Provides the feedback needed when learning double-unders
Ceramic ball bearings create smooth rotation
Connected app offers metrics tracking and jump rope workouts
Can return within 60 days — no questions asked
Cons
Access to CrossRope app costs $99 annually
Handles may feel heavy
For any newcomers to CrossFit or jump rope WODs, mastering the double-under is a must. Of course, single-unders can get your heart pumping and are a great starting point. But during double-unders, the rapid rotation of the rope raises the intensity by forcing you to perform quicker jumps. That intensity is what makes this classic CrossFit movement so effective and efficient for helping with weight loss. (3)
As our tester (a CrossFit Level-1 trainer) noted, “When you’re first learning double-unders, you need feedback from the rope,” they explained. “Feedback means you can feel where the rope is, which heavier ropes make much easier.” Enter the CrossRope Get Lean Jump Rope Set. Not only can the two included cables provide that feedback, the ceramic ball-bearing rotation system earned a 5 out of 5 from our other tester, a certified personal trainer.
“It’s not just ad-speak,” they said. “The rotation is buttery-smooth.” They also appreciated being able to progress to the lighter of the two cable weights as they improved, which prompted another 5 out of 5 for rope weight and width. “I love having the two cables and both felt great. Plus, they were so easy to change out.” Before locking in your purchase, they also recommend checking out CrossRope’s sizing chart to help pick the right length for you.
That’s great, but $129 just for a heavy rope? Our tester rated its value a 3 out of 5, and was skeptical they were worth the above-average price. “There is an app that has workouts, but you also have to pay another $99 for a year subscription,” they said. “The cables are definitely nice with no kinks or tangles, but I don’t know if they are $129 nice.”
Best CrossFit Jump Rope for Grip: WOD Nation Atlas Weighted Jump Rope
WOD Nation Atlas Weighted Jump Rope
WOD Nation Atlas Weighted Jump Rope
The contoured and thick rubber handles provide a secure grip, while each handle also holds 0.5 pounds of removable weight. Its cable length is also adjustable without needing to be cut.
Specs
Price: $40
Product Weight: 1lb. handles
Handle Length: Unlisted
Cable Length: Adjustable
Pros
Contoured and thick rubber handles provide a secure grip
Each handle holds 0.5 pounds of removable weight
Cable length is adjustable without cutting
Cons
Cable is simply attached to handle without any kind of rotation system
Its weighted rope makes it less portable than lighter options
Whether you’re going for a new double-under PR or your hands tend to sweat more than you care to admit (talking to myself), a comfortable grip is one of a CrossFit jump rope’s most important qualities. Our tester, a CrossFit Level-1 trainer, is one of those people, so the contoured rubber handles on the WOD Nation Atlas Weighted Jump Rope were an easy 5 out of 5 for handle padding.
“As someone who has (more than once) launched a jump rope across my CrossFit box, I absolutely love these handles,” they said. “They were so grippy, they almost felt sticky. The diameter is about 1 inch, so someone with really small hands may find them too thick. But for people like me, whose hands get sweaty and slippery, I can’t recommend them enough.”
Beneath the rubber grip is a plastic handle, but the actual material isn’t listed, so our tester scored the handle’s material a 4 out of 5. “Honestly, all you need to know is that they won’t go flying during your set.” Beyond the grip itself, the handles also feature removable half-pound weights to work in some upper body exercise, along with forcing you to engage your core to stay balanced.
The rope itself kept the high marks coming. “I liked that I didn’t have to ‘cut and size’ the PVC-coated cable and could just use the little adjustment screw,” they explained, rating its sizing and adjustment 5 out of 5. It earned two more 5 out of 5 scores for the rope’s weight and its overall value. “You get a speed cable and a 4-millimeter heavy rope, which makes it super versatile for a $40 rope.”
Compared to the ball bearing systems and packability of pricier ropes, a rope around this price — $10 less than the average range for CrossFit jump ropes — won’t feel as luxurious, but our tester found it a high-quality pick nonetheless. “I mean, there’s no fancy rotation system — just a rope in a hole,” they said. “It also won’t pack very well, but as long as you don’t need to take it on a trip, it’s a great option.”
Best Beaded CrossFit Jump Rope: Elite SRS Beaded Jump Rope
Elite SRS Beaded Jump Rope
Elite SRS Beaded Jump Rope
The sound of the beads provides feedback to develop rhythm and cadence while you jump. Plus, its size-and-cut cable can suit athletes up to 6 feet 4 inches. The one-inch plastic beads also protect the cable during outdoor use.
Specs
Price: $22.97
Product Weight: 0.35lbs
Handle Length: 5”
Cable Length: 10’; size and cut
Pros
Sound of the beads provides feedback to develop rhythm and cadence
The size-and-cut cable can suit athletes up to 6 feet 4 inches.
One-inch plastic beads protect the cable, allowing outdoor use
Cons
Some customers have experienced fraying ropes under the beads
Rotates slower than ropes with rotation systems like ball bearings
If the click-clack of beads on a sidewalk takes you back to your childhood days of double dutch or skipping rope, the Elite SRS Beaded Jump Rope may help you mix a bit of nostalgia into your workouts. While we haven’t had the chance to put this exact rope to the test, beaded ropes are good options for working on your technique outdoors. The 1-inch plastic beads help to protect the cable underneath while providing the audible feedback that can help you develop a consistent jumping rhythm.
You may get some side eyes if you bring it to your box, but for just under $23, you can spice up outdoor training sessions without worrying about damaging your speed rope. Some customers highlighted that while the cable may rotate slower than ropes with ball-bearing systems, that may be ideal for beginners or for anyone practicing CrossFit favorites like double-unders or crossovers. “I bought this specifically to work on crossover jumps,” reads one five-star review. “I am 5 feet 4 inches and removed 20 beads, and it works fantastic.”
The 10-foot cable should suit athletes up to 6 feet 4 inches, but much like pricier ropes, you can measure and cut the cable yourself to match your height. After measuring the rope, any good pair of scissors or wire cutters should be able to handle the job.
A handful of users were dubious about the Elite SRS Beaded Jump Rope’s longevity, including this customer who noticed some fraying. “I spent the extra money thinking this rope would be a high-qualitybeaded jump rope, but after four sessions at 10 minutes each, I noticed the end of the rope is starting to fray,” reads this two-star review. “The performance of the rope is good, I just wish the quality was better.”
Best Budget CrossFit Jump Rope: WOD Nation Speed Jump Rope
WOD Nation Speed Jump Rope
WOD Nation Speed Jump Rope
At $32.67, this durable, lightweight jump rope costs around $17 below the average range for CrossFit ropes. Both included cables spin quickly and smoothly.
Specs
Price: $32.67
Product Weight: 0.41lbs
Handle Length: 6.75”
Cable Length: 10’; size and cut
Pros
At $32.67, it’s around $17 below the average range for CrossFit jump ropes
Durable and lightweight
Two cables included
Smooth and fast spin
Cons
Handles are plastic
Nuts holding cable in place can occasionally come loose
If you’re looking for the rope the pros use, the WOD Nation Speed Jump Rope has been our expert reviewer Kate Meier’s go-to CrossFit jump rope for five years. As she points out, you’ll get a back-up cable in case you ignore the manufacturer’s instructions (like she did…) “This thing is just incredible. I’ve used it regularly for five years. I replaced the first cable after three and a half years because I (foolishly) used it on pavement,” she explained, rating both its value and her workout experience 5 out of 5.
The bearing rotation system is reminiscent of much more expensive ropes and also earned a 5 out of 5 from Meier. “It spins super quick and can rotate 360 degrees,” she said. “The cable itself is 2.5 millimeters and fast as heck. It’s definitely the thinnest and lightest jump rope I’ve used.” It’s perhaps no wonder that the rope’s width and weight also garnered a rating of (wait for it…) 5 out of 5.
As she learned through experience, this speed rope should only be used on soft and smooth surfaces, like typical rubber gym flooring. “After seeing how quickly the cable coating can wear down, I bring out a few rubber squares from my home gym if I want to use it outside,” Meier explained, scoring our outdoor use category just 2.5 out of 5.
The basic plastic handles may not impress when stacked up against the padding and knurling of pricier CrossFit jump ropes, but Meier rated both their material and feel 3 out of 5. “They are just run-of-the-mill plastic handles, but I think they’re comfortable,” she said. “I am definitely not nice to these handles. I toss them in my car, on the floor, or across the gym in the midst of a double-under tantrum, but I’ve never seen a crack.”
Benefits of the Best CrossFit Jump Ropes
BarBend expert reviewer Kate Meierpoints out that even a short jump rope session can be a worthwhile cardio workout at home or your box.“Jump roping is a fantastic, full-body exercise for those looking to elevate their heart rate and work up a sweat in a short amount of time,” she says. “Even just 10 minutes of jump-roping can burn around 100 calories, depending on your intensity.” (4) Check out a few other benefits these efficient pieces of equipment bring to the table.
Practice Double-Unders: While singles and crossovers are challenging in their own right, the double-under is a CrossFit classic for a reason. The double-under requires a more explosive jump than singles, as well as increased coordination. Finding a jump rope designed with this movement in mind could be the key to setting your next PR.
Improved Cardiovascular Endurance: Regular cardio exercise (thus elevating your heart rate) can improve circulation, endurance, and overall cardiovascular health. (1) In one Harvard study, jump-rope workouts were shown to burn as many calories in 10 minutes as did running for 30 minutes. (4)
Enhanced Coordination: Along with boosting their cardio, Meier incorporates jump ropes into workout plans for her clients looking to improve their overall balance. “In general, I love prescribing any kind of jumps to my clients as they progress working through balance and coordination exercises,” she says. “Jumping rope is an excellent way to get the mind and body in sync. You have to concentrate on timing your jump as well as getting your upper body to coordinate with your lower body.” (2)
Accessibility and Portability: Often weighing just a few pounds, jump ropes also conveniently coil up and can fit in most gym bags or backpacks. Being able to easily take your CrossFit jump rope on a trip or back and forth from your box makes them some of the best compact exercise equipment available.
How Much Do the Best CrossFit Jump Ropes Cost?
If you thought every CrossFit jump rope was just a simple 10-foot rope, think again. The options on our list range from $22.97 to $165. These jump ropes run the gamut of plastic handles with plastic beads to Bluetooth-connected smart ropes. Take a look to see which option may be best fit in your budget.
Best CrossFit Jump Rope Overall
Rogue Fitness SR-2 3.0 Jump Rope
$46.50
Best High-End CrossFit Jump Rope
RX Smart Gear EVO G2
$165
Best CrossFit Jump Rope for Speed
RPM Comp 4
$70
Best CrossFit Jump Rope for Learning Double-Unders
CrossRope Get Lean Jump Rope Set
$129 to $149
Best CrossFit Jump Rope for Grip
WOD Nation Atlas Weighted Jump Rope
$40
Best BeadedCrossFit Jump Rope
Elite SRS Beaded Jump Rope
$22.97
Best Budget CrossFit Jump Rope
WOD Nation Speed Rope
$32.67
How To Measure a Jump Rope
After you take your shiny new CrossFit jump rope out of its package, you may need to size and cut the cable to suit your height. If you’re clueless about how to measure a jump rope, our expert reviewer Kate Meier breaks it down.
“Finding the right rope length is simple. Step on the rope with one foot and pull the handles up toward your shoulders. The base of both handles should hit you at your armpits,” she explains. “If the handles are lower than that, you need a longer rope. If they are above your shoulders, you should shorten your rope a little.”
What to Consider Before Buying the Best CrossFit Jump Ropes
From HIIT workouts to steady-state cardio, consider how adding a CrossFit jump rope will fit in your regimen. Also pay attention to the rope itself. How long of a cable do you need? Why would I want a heavy rope instead of a thin one? Check out a few of the key factors to consider before buying a new jump rope.
Intended Workouts
As you peruse our list, imagine how each rope might fit the workouts you want to take on. If you already have experience with the CrossFit darling, the double-under, and just want to get faster, check out a speed rope. For newcomers or those still figuring out how to start CrossFit, a heavier rope that will rotate more slowly may be better for learning common movements like singles, crossovers, and dubs.
Cable Length
Most brands will feature some sort of sizing guide for their jump ropes and, as our expert reviewer Kate Meier points out, it’s one of the most important details to look for. “Before you start jumping, getting the right size rope length is imperative,” she says. “Too short of a rope means you’ll be whipping yourself in the legs entirely too often; too long of a rope means the rope will hit the ground way out in front of you, affecting your timing and likely causing you to miss your jump.”
Weight
The weight of the cable should match two things: the movement you’re attempting and your experience level. As some of our testers learned the hard way, when you’re learning advanced movements, like double-unders or crossovers, a thin speed rope can leave welts if you mistime your jump. Beginners may be better off with a heavier rope that provides plenty of feedback as you practice.
Training Surface
Before you commit to a new rope, consider the surface it’s going to come into contact with. If your cable is exposed and subject to repeated contact with a hard or abrasive surface, like concrete or asphalt, it won’t take long for it to fray. Most CrossFit jump ropes are designed to stay indoors and be used at your gym or on rubber flooring. Consider whether you’ll be able to keep your rope intact by sticking to a more forgiving surface.
Jump Rope Sizing Chart
As a rule of thumb, your jump rope cable should be around 3 feet longer than your height. If the option you choose uses the size-and-cut method, follow Kate Meier’s recommendation above. Also consult the brand’s sizing chart. For a general idea of the ideal length to match your height, take a look at our sizing chart.
User Height
Rope Length in Feet
Rope Length in Inches
3’3”- 3’5”
6’3”- 6’5”
75 – 77
3’6”- 3’8”
6’6”- 6’8”
78 – 80
3’9”- 3’11”
6’9”- 6’11”
81 – 83
4’0”- 4’2”
7’0”- 7’2”
84 – 86
4’3”- 4’5”
7’3”- 7’5”
87 – 89
4’6”- 4’8”
7’6”- 7’8”
90 – 92
4’9”- 4’11”
7’9”- 7’11”
93 – 95
5’0”- 5’2”
8’0”- 8’2”
96 – 98
5’3”- 5’5”
8’3”- 8’5”
99 – 101
5’6”- 5’8”
8’6”- 8’8”
102 – 104
5’9”- 5’11”
8’9”- 8’11”
105 – 107
6’0”- 6’2”
9’0”- 9’2”
108 – 110
6’3”- 6’5”
9’3”- 9’5”
111 – 113
6’6”- 6’8”
9’6”- 9’8”
114 – 116
6’9”- 6’11”
9’9”- 9’11”
117 – 119
7’0” – 7’2”
10’0” – 10’2”
120 – 122
Best CrossFit Jump Ropes FAQs
What is the best CrossFit jump rope?
Our top CrossFit jump rope is the Rogue SR-2 3.0 Jump Rope. Between the knurling on the lightweight, aircraft-grade aluminum handles and its speedy rotation, it was an easy choice for our team.
What jump rope do pro CrossFitters use?
While athletes at the CrossFit Games may have their own personal preferences, many favor the thin cables and fast rotation of speed ropes, like the RPM Comp 4. For lightning-fast double-unders, speed ropes generally use ball-bearing systems that allow for 360-degree rotation and quick spins.
How do I choose a jump rope for CrossFit?
First consider your experience level. As some of our testers learned, you don’t want to be learning double-unders with a thin, welt-inducing speed rope. CrossFit jump rope workouts for beginners may call for a heavier rope that provides more feedback and slower rotation, while experienced CrossFitters might prioritize the speed that can help set new PR’s.
What is the most effective jump rope style?
It may depend on your experience level, but bouncing on the balls of both feet can provide more of a challenge than the one-foot-at-a-time “skipping” style we may have learned as kids. While any style is better than no style, learning to use the balls of your feet to perform quick jumps can raise the intensity of your workout.
References
Baker, J. A. (1968). Comparison of Rope Skipping and Jogging as Methods of Improving Cardiovascular Efficiency of College Men. Research Quarterly. American Association for Health, Physical Education and Recreation, 39(2), 240–243.
Ozer, D., Duzgun, I., Baltaci, G., Karacan, S., & Colakoglu, F. (2011). The effects of rope or weighted rope jump training on strength, coordination and proprioception in adolescent female volleyball players. The Journal of sports medicine and physical fitness, 51(2), 211–219.
Knighton, C. (2024, February 27). What exactly are double unders? the mystery solved. WODprep. https://wodprep.com/blog/what-are-double-unders/
Harvard Health Publishing. (2021, March 8). Calories burned in 30 minutes for people of three different weights. https://www.health.harvard.edu/diet-and-weight-loss/calories-burned-in-30-minutes-for-people-of-three-different-weights
We receive free products and receive commissions through our links. See disclosures page.
While many of the best fitness apps understandably want to appeal to a wide range of disciplines, some athletes are just looking to toss around heavy objects. If that sounds like you, the best weightlifting apps can provide the expert instruction, personalized programming, and motivation to reach your muscle-building goals. Whether you need your own personal trainer, an AI-powered workout plan, or just to keep track of all your reps, these apps are designed with weightlifters in mind.
BarBend’s roster of competitive weightlifters — including a USA Olympian — and certified personal trainers is uniquely positioned to offer up critiques of these strength-training apps. In short, we know how to spot a phony. These user-friendly apps might be a good fit for lifters looking for the complete personalized experience or simply a detailed workout log. Read on and check out what our team had to say about their time with the best weightlifting apps.
This article has been reviewed by Amanda Capritto, CPT, CES, CNC, CF-L1, CSNC, a certified personal trainer and CrossFit Level-1 instructor. She reviewed the research we cite to help ensure we’re providing helpful, accurate descriptions and recommendations.
How We Tested and Chose the Best Weightlifting Apps
The BarBend team of certified fitness professionals includes competitive weightlifters (including a member of the USA Olympic team), certified personal trainers, and gym owners. In short, we have the expertise to spot a quality weightlifting app. For each of the over 60 fitness apps we’ve tested, we assigned ratings of 1 (lowest) to 5 (highest) across 13 categories, including ease of use, instruction, and progressive overload.
Ease of Use: Since there’s nothing worse than pausing a workout due to a clunky or glitchy app, we prioritized user-friendly options that we had no issues navigating on our iPhones and tablets.
Periodized Programming: “I encourage consumers to look for weightlifting apps that offer periodized programming that runs in blocks and phases,” says our expert reviewer, Amanda Capritto. “For instance, you can run a 16-week program that has two eight-week phases, and in each eight-week phase there is a four-week block,” she says. “This style of training prioritizes progression while maintaining a prophylactic deload schedule. (Deloads are important to provide your body time to adapt to all of the training you have been doing.)”
Value: Whether you’re after the full personal training experience or just want to log your workouts, we only included apps that we think offer the value to get the best bang for your buck.
Level of Instruction: When putting our list together, we sought to include a range of apps, with some that offer individualized coaching and others that simply exist to help you track stats. The instruction in these apps earned the seal of approval from our team of certified fitness pros and competitive weightlifters.
Required Equipment: The apps we picked for our list cover a wide range of equipment demands. Whether you’ve got a single pair of dumbbells or a home gym tricked out with the best weight benches, plates, and racks, there’s an app on this list for you.
Best Weightlifting App Overall: Future
Future
Future offers online personal training in every facet of fitness. Every client gets a certified fitness professional who will prescribe training programs, follow up daily to assess progress, make program adjustments as needed, and offer accountability.
Specs
Price Per Month: $199
Equipment Required: Bodyweight, home gym, commercial gym
Training Type: Strength and conditioning
Available On: iOS, Android
Pros
After the initial survey, you choose your personal trainer
Check in with your trainer post-workout
Flexible scheduling
Seamlessly integrates with Apple Watch
Cons
At $199 per month, it’s expensive
No real-time coaching available
The Future app is the all-inclusive resort of weightlifting apps: personalized, challenging, motivating, and flexible. Several members of our team have used Future, including BarBend editorial member and competitive weightlifter Kate Meier, NASM-CPT, USAW-L1, CF-L1. “Future is just incredible. My schedule is super busy, so having a flexible plan (crafted by a certified trainer, no less) is a must,” she says.
After 30 days with his Future personal trainer, Jake Herod, NASM-CNC, rated both its setup and ease of use both 5 out of 5.
After completing the initial assessment, you’ll be “matched” with several personal trainers, but the choice is yours. First, pick a trainer that aligns with your preferences, goals, and fitness level. Whether you’ve stocked your home with one of the best squat racks and dumbbells or want to stick to bodyweight, your trainer will get to work creating a personalized training plan.
All our testers loved the messaging feature that essentially lets you text your trainer anytime within the app. Plus they can send video messages and you can schedule live video chats. Meier loved her trainer, rating Future’s interactive features 4 out of 5, only knocking a point because your trainer won’t be “live” with you during your workouts.
“Ok, ideally, my trainer would just be watching me during a workout to assess movements and correct my form,” she explains. “But I do love being able to send videos afterwards for review. Most programs can’t even do that. Plus, they respond super fast.”
After sessions, you can provide feedback to your Future personal trainer, which can help them make adjustments to your next workout.
Another of our testers highlighted the flexibility their trainer showed when their vacation took them away from their usual equipment. “To accommodate my travels, my coach gave me bodyweight workouts since I didn’t have any of my typical equipment with me,” they said, rating Future’s equipment demands 5 out of 5. “I enjoyed how simple it was to switch up my routine, and the communication between athlete and trainer is top notch.”
With two coaching subscriptions to choose from (one group oriented and one individualized), Caliber can be an excellent tool for guiding your fitness journey. The prescribed workouts can be tailored to your available equipment, and you’re in constant communication with your personal trainer through the app’s chat feature and video call capabilities.
Specs
Price Per Month: Free, $19, or $200
Equipment Required: Bodyweight, home gym, commercial gym
Training Type: Strength training
Available On: iOS, Android
Pros
Customized personal training and guidance suitable for beginners
Offers suggestions for nutrition, sleep, hydration, and mobility
Group-oriented subscription includes basic instruction and tracking
Cons
Nutrition advice is general and not customized
Uploading images for feedback can be tedious
The Caliber app offers different levels of membership based on where you are in your fitness journey. Before signing up for the Premium membership for $200 per month, our tester, a certified personal trainer, was impressed with the free version. “For being completely free forever, I thought the library of workouts was pretty robust,” they said. We like that newcomers to weightlifting will have the freedom to sniff around the no-cost version before committing to the group or one-on-one subscriptions.
The Caliber app.
If you do opt for the Premium version, you’ll match with several certified trainers and choose one based on your preferences and goals. Once you find a good fit, all that’s left to do is lace up your best weightlifting shoes and follow their lead. Our tester rated five categories 5 out of 5, including instruction and interactivity. “I liked how much communication you have with your prescribed coach, plus I found the video demos for each movement to be very well-done,” they noted.
The Caliber app menu.
Our tester also thought that consistent communication is vital to keep beginners motivated. “You also get weekly asynchronous check-ins, which might be my favorite part of the app experience,” they said. “My coach would give me feedback along with incremental goals each week, which really kept me motivated.”
Screenshots of the Caliber app from a BarBend tester.
With several levels of membership, we found the pricing structure a bit confusing. After reaching out to customer service (whose quick and clear response earned them a 5 out of 5), we learned that the $200 monthly subscription requires a three-month commitment. However, as a personal trainer themselves, our tester thought all three levels deserved a 5 out of 5 for value.
“Personal training is not cheap, but especially for anyone struggling with accountability or motivation, it’s usually worth it,” they explained. “You don’t have to renew after months, so honestly, this is a good deal considering you also get general wellness advice, as well.”
This impressive workout app packs in plenty of workout programs and instruction for less than $7 per month. Subscribers gain access to over 90 dedicated fitness regimens for a slew of targeted goals like muscle gain and fat loss — and a discount on Bodybuilding.com purchases doesn’t hurt, either.
Specs
Price Per Month: $6.99
Training Discipline: Strength training
Equipment Required: Home gym equipment or commercial gym
Available On: iOS, Android
Pros
Monthly subscription only costs $6.99
Features 90 fitness plans
Instruction features videos, images, and written guidance
Cons
Outside of push notifications, not much accountability
Required equipment may determine programs you can follow
Names of exercises can be confusing
With over 90 training programs crafted by top names in the industry — Jamie Eason, Kris Gethin, and Jim Stoppani, to name a few — our team thinks BodyFit is the best option for weightlifters on a budget. BarBend editorial member Ben Emminger says that, given the cost of pricier apps, that lineup is even more impressive. “With a roster this star-studded, you’d expect the cost to follow suit, but a monthly membership to BodyFit is just $6.99,” he said, rating BodyFit’s pricing 4.6 out of 5. “For reference, apps like iFIT and Juggernaut AI can cost you up to five times as much.”
He also thinks that the quality of instruction sets it apart from other low-cost weightlifting apps. “Having used BodyFit in the past, I can attest to its effectiveness in delivering worthwhile instruction,” he said, rating this category 5 out of 5. “I’ve found the multi-layered guidance (textual, auditory, and visual) for each prescribed exercise to be top notch.”
With a database of over 3,500 exercises, you can have the app build workout routines for you based on your goals and available equipment, or craft one yourself. Another tester, a certified personal trainer, appreciated the wide range of required equipment. “Some movements might require a trip to the gym, but there are plenty that need minimal equipment or none at all.”
While our certified team is fluent in fitness, Emminger pointed out that some of the names of those exercises could cause confusion for beginner weightlifters. “There have been multiple instances where a certain exercise has been given a convoluted moniker, which can lead to some challenges when trying to follow along with a training session,” he said.
At $6.99 per month, our other tester wasn’t expecting much by way of accountability, but only rated this area 1.5 out of 5 because they felt it was on par with even some free workout apps, like Nike Training Club. “Even when opting for the push notifications, they’re few and far between,” they noted.
Best Free Weightlifting App: Hevy
Hevy
The free version of Hevy allows unlimited workout tracking. You can store up to four routines and add up to seven custom exercises for free.
Specs
Price Per Month: Free or $2.99
Equipment Required: Depends on available equipment
Training Type: Strength and conditioning
Available On: iOS, Android
Pros
Free version allows unlimited workout tracking
Store up to four routines for free
Add up to seven custom exercises
Cons
Free version can only track weight and waist inches
Most functionality requires Premium subscription
No long-term programs, only workouts and routines
Many of the best personal training apps offer free versions to give lifters a taste of their premium offerings, but our tester, a USA Olympic weightlifter, thinks Hevy’s has a lot to offer. “The major difference between the free and PRO version is the number of custom exercises and routines you can save,” they explained. With the free version, you can create and save up to seven custom exercises and four workout routines. “You would also get a few more measurements with the paid version, but I like that the free level keeps track of your weight and waist size.”
The hundreds of exercises in its library feature video demonstrations, but it was the social component of the app that had our tester raving about Hevy. “Lifting alone can be a little isolating, so being able to connect with other athletes is a big deal,” they said.
This aspect is crucial for motivation and earned the app a 4.5 out of 5 for interactivity. “It feels like its own social network. You can share workouts and videos, plus like and follow other users,” added our tester.
Hevy’s easy breezy setup also earned a 5 out of 5. “It’s super simple. Just make an account, create a profile, and start logging workouts,” they said.Even if you only used it as a dedicated workout logbook, our tester thinks you’re getting a lot for your $0-per-month commitment. During setup, you can even sync it up with many of the best fitness trackers, like Apple Watch or Garmin. “Essentially, this is a solid workout tracker with a big community. I honestly think there’s enough in the free version to not even need the $3-per-month level.”
The variety of exercises also means the type of equipment you’ll need will vary. Our tester rated this category a 3 out of 5, but appreciated the focus on weight training. “The equipment you need depends on the kind of workouts you want to do. A lot of the exercises need some kind of weight, but it actually has a bunch of cardio, HIIT, and bodyweight movements, as well, so it’s a solid app for home workouts.”
Best Weightlifting App for Powerlifters: JuggernautAI
JuggernautAI
This AI-powered strength training app curates workouts for you based on your initial fitness levels and daily readiness. The more you log your data, the more your algorithm learns in an effort to keep you progressing through PRs.
Daily prompts can adjust your workouts immediately
Cons
Requires access to equipment like barbells and free weights
No interaction with coach or trainer
For a fitness app to make money, it generally has to appeal to a wide user base. Since many of the best online workout programs are focused on cardio, bodyweight, or beginner weightlifting, BarBend expert reviewer Amanda Capritto appreciates the powerlifting and bodybuilding focus of JuggernautAI. “One of my favorite apps for advanced lifters is JuggernautAI, which offers somewhat personalized programming suited to individuals who are comfortable and confident lifting weights,” she explains.
After feeding this AI-powered app details like your current training load, frequency, and fitness goals, you’ll receive an individualized program. These plans start at four weeks, and the setup process easily earned a 5 out of 5 from our tester, a certified personal trainer. “It was a super easy process. Type in a few data points and, boom, you have your personalized plan,” said our tester.
Using the Juggernaut AI app.
Once they got rolling, our tester was blown away by just how responsive the AI was to their feedback. “It’s insanely impressive,” they said. “It feels very personal compared to apps that just have on-demand workouts with no individualization.” Before every workout, you can also provide a “readiness rating” based on how you slept, how sore you feel, and even what you’ve eaten that day.
Our tester even explained that the more the AI “gets to know you,” the more customized your program can be. “It continues to adapt over time, so the longer you use the app and the more diligently you input data, the smarter and more personalized your program will become,” they said. While, of course, a glistening home gym replete with the best power racks, benches, and plates would be ideal, they also noted its flexibility in required equipment, rating that category a 4 out of 5.
While both accountability and instruction scored 3.5 out of 5, our tester says JuggernautAI is well worth the $35 per month. “They don’t match up to what a live trainer offers, but in terms of value, Juggernaut AI is simply phenomenal for $35 a month,” they said, rating its value 5 out of 5. “It’s like getting the insights of a real coach for next to nothing.”
Best Weightlifting App for Variety: Jefit
Jefit
Each of the over 1,400 exercises in Jefit’s library features a video demonstration to help you learn new movements.
Specs
Price Per Month: $12.99
Equipment Required: Bodyweight, home gym, commercial gym
Training Type: Strength training
Available On: iOS, Android
Pros
Library with wide variety of over 1,400 exercises
Video demonstrations to help you learn new movements
Progress monitoring
Syncs with Apple Watch
Cons
Little interactivity without paying for personal training
Free version contains ads
If you’re looking to mix up your training a bit, the variety offered by Jefit’s library of 1,400 exercises is great for learning new movements. BarBend editorial member and competitive weightlifter Kate Meier highlighted the diversity of training when she explored the app herself. “Honestly, this library is one of the most comprehensive I’ve seen. I searched “snatch” and 15 different variations came back,” she said. “Jefit is not meant for personal training, but for variety, this is the ticket.”
The video demonstrations for each movement were enough to earn the app’s instruction a rating of 4 out of 5 from Meier, even without the personal training component. “Obviously, you won’t get any form correction from the videos,” she said. “But they do offer a personal training tier that starts at $80 a month — still not bad.”
At $12.99 per month, the “Elite” membership unlocks some advanced metric tracking, plus you can build workout routines with cues that pop up during training. Meier noted how helpful this would be in the heat of a workout when she rated its ease of use 4 out of 5. “As you lift, you’ll have a visual to refer to if you need a reminder or are confused about technique,” she said. “It’s also very intuitive. You can log reps and weight as you go, too.”
While the extensive library and structured programs earned Jefit a 4 out of 5 for value, Meier pointed out that the interactivity is next to none. “Unless you hire a personal trainer through the app, there’s really no interaction,” she said, rating this area a 2 out of 5. “I don’t think it’s really meant for that kind of coaching, though.”
Best Weightlifting App for Experienced Weightlifters: Strong
Strong
For advanced athletes looking for an intuitive way to log their workout sessions, Strong can be a viable solution. The library of over 200 exercises is easy to work through, and the $4.99 monthly subscription is more approachable than many other platforms on your dedicated App Store.
Specs
Price Per Month: Free or $4.99
Equipment Required: Depends on available equipment
Training Type: Strength training
Available On: iOS, Android
Pros
Detailed, intuitive tracking for advanced weightlifters
Personal records are highlighted
Body part measurements and other metrics tracking
Cons
No guidance or instruction
Limited metrics tracking available in free version
For experienced weightlifters, keeping track of the details — weights, reps, measurements, etc. — is a crucial element of continuing to get stronger and staying ready for competitions. Strong is our top pick for athletes that have sweat their way through more than a few of the best weightlifting belts. Our tester, an Olympic weightlifter, credits the in-depth tracking capabilities of apps like Strong with maintaining their level of readiness and motivation.
“This is essentially a workout and metrics tracker, but one of the simple features that is actually great for long-time lifters is that it highlights personal records,” they said. “After so many years of competing, little things like that help keep me motivated.”
The simplicity of the app is what made it stand out to our tester, who noted that while it lags behind other options in terms of instruction, that may not matter much to experienced weightlifters.
“Aside from the animations for the movements, there’s really not much instruction,” they said, rating this category 3 out of 5. “That may not be great for beginners, but for advanced lifters who are already familiar with most of these movements, I don’t think that’s a big deal.”
Along with tracking individual workouts, you’ll also be able to save “routines” that help save some of the tedium of entering your data. “The free version only lets you save three routines, so it might be worth the subscription just to help keep track of full powerlifting or bodybuilding programs,” our tester explained.
With the paid version, you’ll also get access to more detailed measurements, like neck, biceps, and shoulders. Overall, we think Strong makes a solid case to become your weightlifting database.
Best Weightlifting App for Home Gyms: Ladder
Ladder
Most of the workouts only require basic home gym equipment and their programming adheres to the principles of progressive overload. The app can also track your progress.
Specs
Price Per Month: Starts at $29.99 per month
Equipment Required: Depends on available equipment
Training Type: Strength training
Available On: iOS
Pros
Most workouts only require basic home gym equipment
Adheres to principles of progressive overload
Can track your progress
Cons
Some movements may be complex for beginners
Not available on Android
After building out your dream home gym, you might need a virtual hand in getting the most out of it. That’s where Ladder comes in. Our tester, a certified personal trainer, loves that the programming — a 5 out of 5 — follows the muscle-building principles of progressive overload.
“After using it for a few months, Ladder’s calling card is their programs. They all follow a series schedule, which are designed to promote strength gains in about five to six weeks,” they explained. Ladder’s adherence to progressive overload itself earned a 5 out of 5 from our tester, who highlighted the gradual increase in intensity throughout their program.
Whether your space is decked out with the best home gym equipment or you’re limited to a few sets of kettlebells and dumbbells, the equipment required in these workouts is flexible. “The coaches are really clear about alternate options for equipment,” they said, rating Ladder’s equipment demands 4 out of 5. “For instance, for deadlifts you could swap out a barbell for dumbbells and vice versa.”
In their kettlebell program, however, our tester noted that their background in fitness came in handy. “The coaching is great overall,” they said, scoring the instruction 4 out of 5. “But I feel like someone new to weightlifting may struggle without feedback.” Subscriptions start at $29.99, but you can also connect with an individual coach for $44.99 per month.
We think Ladder may also be ideal for those with busy schedules, as our tester explained. “Look, I have three kids. I don’t always have the time or energy to program my own workouts,” they said. “That’s a big draw of this app for me. It’s great for taking the guesswork out of creating my own plan.” That convenience was the main factor in their 5 out of 5 rating for value.
Benefits of Weightlifting Apps
As our expert reviewer Amanda Capritto points out, these options can offer the motivation and instruction to help athletes work a variety of different muscle groups. “Individuals who want to get stronger and/or build muscle will benefit from a weightlifting app, especially people who struggle to stick to a plan.” From Romanian deadlifts to biceps curls, these apps also offer visual demonstrations and cues to help refine your technique.
Expert Instruction: The experts available on these apps include certified instructors and trainers that our own certified team members say have the experience to help you reach your goals. From weekly messages to live video chats, connecting with expert instructors can help you learn new movements and stick with your program.
Convenience: With professional instruction and video demonstrations in your pocket, it’s hard to beat the convenience of these apps. Compared to the logistics of hiring a personal trainer, these apps make lifting weights more accessible.
Motivation: As Capritto notes, the individual attention of a trainer, along with the routines created by these apps, can help you stay the course. “Subscribing to an app, especially one that offers access to a real personal trainer, can keep you motivated and disciplined,” she says.
Value: “Weightlifting apps provide a form of structure and accountability, and they are inexpensive compared to hiring an in-person trainer or coach,” Capritto explains.
Strength Training: “Weightliftingapps offer programming specifically for strength training,” Capritto says. “Although weightlifting purists may quip that ‘weightlifting’ only refers to the sport of Olympic weightlifting (and they’d technically be right), the breadth of what we know as weightlifting apps available today cater to every type of lifting, from bodybuilding to powerlifting to general strength training.”
How Much Do Weightlifting Apps Cost?
Most weightlifting apps offer subscription levels, as well as free versions. Some feature individualized coaching or advanced metric tracking. Whether you’ve just started creating fitness goals or are preparing for your next competition, check out our chart to see how much these options cost.
Best Weightlifting App Overall
Future
$199 per month
Best Weightlifting App for Beginners
Caliber
Starts at $200 per month
Best Budget Weightlifting App
BodyFit
$6.99 per month
Best FreeWeightlifting App
Hevy
$2.99 per month
Best Weightlifting App for Powerlifters
JuggernautAI
$35 per month
Best Weightlifting App for Variety
Jefit
$12.99 per month
Best Weightlifting App for Experienced Weightlifters
Strong
$4.99 per month
Best Weightlifting App for Home Gyms
Ladder
Starts at $29.99 per month
What to Consider Before Buying Weightlifting Apps
Before committing to a new weightlifting app, there are few key factors to consider, like the equipment you have on hand, how much accountability you may need, and the types of workouts you want to take on. Also consider how much you can spend monthly to secure access to the type of training you’re after.
Adjustability and Equipment Demands
As our expert reviewer Amanda Capritto points out, take stock of the equipment you own or can access at your gym before subscribing to an app. “You may not always have access to the same gym, e.g., when you are traveling,” she says.
BarBend’s Jake Herod bench pressing a barbell in the gym.
Not every workout should require the best bumper plates or a full squat rack. “Does the app allow for alternate exercise selection so you can still work out and log your session? Not all apps do, but it’s a key feature in my opinion.”
Progressive Overload
According to one study, “Progressive overload is a principle of resistance training exercise program design that typically relies on increasing load to increase neuromuscular demand to facilitate further adaptations.” (1) As the research supporting the principles of progressive overload grows, Capritto is convinced that apps designed around this method are uniquely effective for increasing strength.
BarBend’s Jake Herod performing the dumbbell bench press.
“The key thing here is that your volume progresses over time during the program, with deload periods scheduled in,” she explains. “I believe progressive overload programming is the best way to reach any fitness goal, but especially for strength training.” Take a look at some examples of the programming each app provides before making your decision.
Accountability
From warmup to cooldown, some of these apps let you connect virtual with a real trainer who is with you every step of the way. Capritto recommends being honest with yourself whether you might need individual attention or just some reminders here and there to keep you on track. “Is there any form of accountability within the app, or are you on your own to complete your workouts? Some people prefer the latter, but many people like to have an element of accountability, such as push notifications reminding them to work out or community groups they can be active in.”
Exercise Selection
Newcomers to weightlifting should consider prioritizing an app that features visual demonstrations of the exercises they’ll be performing. Whether you have your own rig or just just snagged a pair of the best dumbbells, Capritto says to make sure the app’s library of exercises matches your intended training.
Our BarBend tester using the Life Fitness G7
“Whether you are training for powerlifting, bodybuilding, Olympic weightlifting, or general fitness, exercise selection is incredibly important,” she explains. “You’ll want to be certain before subscribing to an app that the exercise selection offered in the programming aligns with your desired outcomes.”
Best Weightlifting Apps FAQs
What is the best weightlifting app?
We picked Future the best weightlifting app because of the level of quality of personal training. After matching with your trainer, you’ll work together to craft and adjust a plan for you based on your equipment, schedule, and fitness goals.
What is the best muscle building app?
We think the powerlifting focus of JuggernautAI makes it well suited to build muscle. With AI-powered programs built just for you, it can adjust your training to create the customized plan you need to build muscle. However, other disciplines besides powerlifting can also build muscle. As BarBend editorial member and certified personal trainer Alex Polish says, “Both bodybuilding and powerlifting-style training can also produce significant improvements in muscle mass.” (2)
Which app is best for gym workout?
Many of the apps on our list can maximize the best barbells, weight plates, and kettlebells at your gym, though apps like JuggernautAI or Ladder are most conducive to a gym workout. For learning new movements that require heavier equipment, Jefit has an extensive library of exercises with video demonstrations.
What is the best weightlifting program?
Our expert reviewer Amanda Capritto says that programs that follow the principle of progressive overload — slowly and systematically increasing load over time — are best suited to help you gain muscle. (1)
References
Plotkin, D., Coleman, M., Van Every, D., Maldonado, J., Oberlin, D., Israetel, M., Feather, J., Alto, A., Vigotsky, A. D., & Schoenfeld, B. J. (2022). Progressive overload without progressing load? The effects of load or repetition progression on muscular adaptations. PeerJ, 10, e14142.
Campos, G. E., Luecke, T. J., Wendeln, H. K., Toma, K., Hagerman, F. C., Murray, T. F., Ragg, K. E., Ratamess, N. A., Kraemer, W. J., & Staron, R. S. (2002). Muscular adaptations in response to three different resistance-training regimens: specificity of repetition maximum training zones. European journal of applied physiology, 88(1-2), 50–60.
If you want to build muscle, you need to target specific muscle groups. Chasing those teardrop quads? Yes, you need to do your lunges and get in those lower body exercises galore. But you’ve also got to stretch your quads to make the most of your workouts and recovery, fighting off soreness and potential knee pain along the way.
You don’t need to be in the physical therapy office to get in your stretches. Check out these nine best quad stretches to ease your muscles into rest mode after an intense workout. You’ll give your thighs the care they need to recover and build muscle quickly.
Best Quad Stretches
1. Partner Quad Stretch
Equipment Needed
Bodyweight-only, yoga mat (optional)
Muscles Worked
Quads
Sets & Reps
2–4 sets of 15 seconds per side
The partner quad stretch doubles as a warmup or cool-down stretch, maximizing your opportunities to prepare your muscles for working out or healing. I love doing this movement whenever my gym trip involves a partner because it’s a quick and easy way to ease my thighs into recovery mode.
How to Do It:
Lie down with your shins, quads, and chest against the floor.
Hold your feet up in the air by bending your knees.
Ask your partner to gently grab your ankles and push them toward your glutes.
Hold this position for at least 15 seconds and switch sides before repeating.
Rocking your shins side to side is optional if you feel extra tight.
Modifications
Make it Easier: Cross your arms beneath your head and rest on them like a pillow during this stretch. This will prevent straining your neck.
Make it Harder: Hold your arms up and out to the sides while lifting your chest off the ground. Maintaining this “superman” pose while your partner stretches your quads will work your abdominal muscles as you stretch.
Coach’s Tip: Don’t push yourself too hard if you feel exhausted from a workout. Stretching your quads to ease their tightness is a substantial muscle recovery goal by itself.
2. Kneeling Quad Stretch
Equipment Needed
Bodyweight-only, kneeling pad (optional)
Muscles Worked
Quads
Sets & Reps
5–10 sets of 5 seconds per side
Kneeling quad stretches are beneficial after any workout, but they are extra helpful after a long run or squat session when your quadriceps muscles have worked extra hard. You’ll stretch every quad muscle without requiring a partner or machinery.
How to Do It:
Kneel on your right knee and position your left foot in front of your body. Your left leg should bend at a 90-degree angle in front of you.
Move your front foot an inch or two farther out. It should leave enough room to lean forward comfortably without losing your balance.
Press your hips forward while keeping your back straight. Your left knee should shift forward over your toes but not past them.
Hold for 30 seconds and lean back before repeating this move on each side.
Modifications
Make it Easier: Place a kneeling pad on the floor and use it to cushion your knees during this stretch. You might feel more comfortable and able to continue this quad stretch longer.
Make it Harder: Grab a pair of light weights and do reverse flies or front raises every time you lean forward. I appreciate being able to sneak an extra workout into my routine without skipping my stretch time to keep up with my busy schedule. You might, too!
Coach’s Tip: If you find yourself struggling to stay upright while leaning forward, do this quadriceps stretch next to a chair. You can grab it for balance as you get used to this movement.
3. Hip Flexor and Quad Stretch
Equipment Needed
Bodyweight-only, yoga mat (optional)
Muscles Worked
Quads
Sets & Reps
5–8 sets of 5 seconds per side
Lifting weights or engaging in cardio exercises activates your quads and hips. Ease both into a looser state with this hip flexor and quad stretch that makes movements easier during workouts.
How to Do It:
Lie on your left side on the floor, extending your legs straight like a pencil.
Raise your left hand to your head and lean on it for support.
Bend your right knee and place your other hand on your right ankle.
Pull your right ankle up to your glutes. You should feel the front of your thigh stretching.
Hold for at least five seconds and release.
Repeat on each side.
Modifications
Make it Easier: Lie down where the ground is soft, like on a carpet or thick exercise mat. You can also fold a pillow under your head to support your neck more easily.
Make it Harder: Hold this stretch for over five seconds while pulling your ankle to the top of your glutes or lower back, depending on your natural flexibility.
Coach’s Tip: Avoid bending your lower back while pulling your ankle up to your glutes. Holding your posture in the pencil-like position could become one of the best quad stretches for your post-workout routine.
The standing quad stretch can happen anywhere, so adding it to your home life or gym routine is easy. I use this movement to gently pull on the front of my thigh when I find it hard to squat, use a stair climber, or sit.
How to Do It:
Stand straight and grab your right ankle in your right hand.
Bend your knee back, pulling your foot to your glutes.
Hold your free arm straight out to the side for balance.
Maintain this position for 20 seconds while staying upright.
Repeat this movement on each side.
Modifications
Make it Easier: Hold onto a chair in front of you for better balance.
Make it Harder: Stand on a small raised platform during this stretch and hold your arm to the side for balance. You’ll work your calf muscles while stretching your opposite leg.
Coach’s Tip: If you don’t have the flexibility to pull your foot to your glutes, hold it as close as possible without experiencing sharp pains. The stretch will remain effective and you’ll develop your flexibility.
5. Lying Quad Stretch
Equipment Needed
Bodyweight-only, foam roller
Muscles Worked
Quads, abs
Sets & Reps
3–5 sets of 5 seconds each
The lying quad stretch is one of the best quad stretches. You’ll use a foam roller to maximize your recovery by applying light pressure to your sore thigh muscles.
How to Do It:
Place a foam roller on the floor and position it horizontally.
Lie on the floor on top of it, placing the foam roller just under your quads.
Prop yourself on your forearms to hold a plank position while putting your body weight on the foam roller.
Lean forward and back on your elbows to slowly move your quadriceps up and down the foam roller.
Repeat this motion for at least five seconds and rest by sitting next to the foam roller between sets.
Modifications
Make it Easier: Sit on the floor with your legs extended in front of you. Move the foam roller up and down the top of your thighs with as much pressure as you can comfortably manage.
Make it Harder: Wear ankle weights during this stretch to engage your core muscles more intensely and apply greater pressure on the muscles in contact with the foam roller.
Coach’s Tip: We’ve found that this stretch is more manageable if it follows other quad stretches in our cool-down routines. Give your arms a break before doing this stretch in a planking position if you’ve just lifted weights.
6. Prone Quad Stretch
Equipment Needed
Bodyweight-only, a medium resistance band
Muscles Worked
Quads
Sets & Reps
5–10 sets of 20 seconds each
[Read More: Stretches and Warm-ups to Improve Ankle Mobility]
Resistance bands are helpful when targeting your leg muscles or upper arms. Use this stretch to banish thigh tension without straining to hold your ankle.
How to Do It:
Lie down with your shins, quads, and chest against the floor.
Loop a medium resistance band around your right ankle and hold it over your right shoulder.
Prop yourself on your elbows and use both hands to pull the resistance band over your shoulder toward the floor.
Press your pelvic bone into the floor if you don’t feel enough tension.
Hold for at least 20 seconds and switch sides before repeating.
Modifications
Make it Easier: Use a light resistance band to ease the tension on your quads if you’re too tight or have limited flexibility.
Make it Harder: Lift your knee off the ground as you pull your ankle toward your glutes to increase how much you can pull on your rectus femoris.
Coach’s Tip: Extra-flexible individuals can pull their foot to the outside of their corresponding hip if this stretch doesn’t provide enough quad tension.
7. Frog Pose
Equipment Needed
Bodyweight-only, yoga mat (optional)
Muscles Worked
Quads
Sets & Reps
2–5 sets of 5 seconds each
People often enjoy the frog pose when they’re too flexible for standard quad stretches. It also doubles as an advanced yoga pose you can add to any yoga routine on your rest days.
How to Do It:
Lie down with your shins, quads, and chest against the floor.
Prop yourself on your left elbow.
Grab your right ankle with your right hand and pull it to your quad.
Grab your left ankle with your left hand and pull it to your quad.
Pull both ankles to the sides of your hip, arching your back to accommodate the movement.
Hold for five seconds and release.
Modifications
Make it Easier: Perform this quadriceps stretch on a cushioned surface, like thick carpeting. Depending on your flexibility, try holding both feet to your glutes or closing them.
Make it Harder: Hold this pose for 10 seconds or longer, pointing your toes to stretch your calf muscles.
Coach’s Tip: Remember, this is an advanced yoga position. At BarBend, we certainly know how tempting it is to push our limits in the weight room, but keep your position expectations realistic as your quads get used to this intense stretch.
8. Lying Pigeon Progression
[Read More: How to Do the 90/90 Stretch to Squat Heavier and Move Better]
Equipment Needed
Bodyweight-only, a medium resistance band
Muscles Worked
Quads, abs
Sets & Reps
5–10 sets of 10 seconds each
The lying pigeon stretch resembles the prone quad stretch but involves a partner. Many people find this makes the pose easier to hold by reducing their back strain.
How to Do It:
Lie down with your shins, quads, and chest against the floor.
Loop a medium resistance band around your right ankle and hold it over your right shoulder.
Give your partner the resistance band and hold your arms in front of you like you’re diving into a ring.
Ask your partner to gently pull on the band for 10 seconds while you lift your chest off the ground to engage your core muscles.
Press your tailbone into the floor if you don’t feel enough muscle tension.
Hold for at least 20 seconds and repeat on each side.
Modifications
Make it Easier: Extend each leg so they’re flat on the ground between sets. This will instantly reduce any tension you feel before the next round.
Make it Harder: Wrap a resistance band around your ankles and have your partner pull it to utilize both sets of quad muscles simultaneously.
Coach’s Tip: Use a heavy or extra-heavy resistance band to increase the intensity of this stretch without pulling your foot closer to your glutes.
Ease your quads with this simple stretch that only requires floor space. You’ll reduce your muscle tension while leaning on your biceps, adding a gentle arm workout to your dynamic warmup or cool-down routine.
How to Do It:
Kneel on the ground and sit on your heels, keeping your back straight.
Place both hands flat on the floor behind you.
Lean backward to stretch your quads.
Lift your hips in the air and hold for five seconds.
Repeat on each side.
Modifications
Make it Easier: Sit on a thick kneeling block to lift your hips without working your abs.
Make it Harder: Pulse your hips in the air for 10 seconds to increase the intensity of this stretch.
Coach’s Tip: This movement may create tension in your lower back. If that occurs, try lying flat on the floor with your legs kneeling. I also like leaning back on my elbows and moving my feet to each side of my hip instead.
Sample Quad Stretch Session
Use this sample quad stretch session guide to start reducing tension in your thigh muscles. You’ll get to know how each movement feels and what’s best for your body without potentially skipping sets or reps.
Partner Quad Stretch: 2 x 15 seconds per side
Kneeling Quad Stretch: 2 x 5 seconds per side
Hip Flexor and Quad Stretch: 5 x 5 seconds per side
Standing Quad Stretch: 2 x 20 seconds per side
Lying Quad Stretch: 3 x 5 seconds per side
Prone Quad Stretch: 5 x 20 seconds per side
Frog Pose: 2 x 5 seconds per side
Lying Pigeon Progression: 5 x 10 seconds per side
Simple Quad Stretch: 8 x 5 seconds per side
[Read More: The Best Leg Stretches to Bolster Your Lower Body Training]
Equipment Needed: In addition to your partner, you’ll need a yoga mat, chair, foam roller, and medium resistance band. You could also choose an area with a thick rug or carpet to cushion your pelvis and tailbone if preferred.
Modifications
Make it Easier:
Do these stretches on a soft surface to reduce the pressure on your tailbone or pelvic bones.
Lean on a chair or partner for stretches that require balance.
Don’t pull on your ankles too hard in the frog pose if you have limited flexibility.
Make it Harder:
Use the tips beneath these individual stretches to increase the intensity of each movement.
Hold the positions for five to 10 seconds longer.
What Muscles Make Up the Quads?
Your quadriceps include four muscle groups listed below. They make leg extensions, jumping, and walking possible. Although you use them daily, your thighs are more susceptible to muscle loss as you get older than your lower legs, so it’s essential to work them out regularly. (1)
Rectus Femoris: This muscle connects with your hip joints, allowing thigh flexes.
Vastus Lateralis: This quad muscle extends your lower leg and helps raise you from squats.
Vastus Medialis: This part of your quads helps your knee bend.
Vastus Intermedius: This muscle supports your knee as it bends and directs blood flow to other quad muscles as a major femoral artery conductor.
Benefits of Stretching Your Quads
Check out these benefits of stretching your quads to motivate yourself during future routines. I’ve noticed these benefits have improved my workouts over time because they helped my thighs get stronger by targeting my tight quadriceps between gym trips.
You May Experience Less Back Pain
Lower back pain is the worst. It makes everything from sitting at work to driving your car uncomfortable. Stretching your quads regularly might help reduce lower back pain because tight leg muscles pull on the lower back.
You May Make Workout Injuries Less Likely
Quad stretches increase your range of motion, which is essential if you work out regularly. I’d never want to start exercising if my muscles were tight. Stretching your quads makes movement safer because you can do the exercises without muscle strain on cold muscles.
You Can Exercise Longer
When your quads are tight, people accommodate the pain by slouching or not extending their legs fully during workouts. Suboptimal posture may indeed increase your risk of injury, and you might also have to shorten your routines. Research shows that certain postures increase fatigue while exercising, reducing the length of each movement. (2)
Frequently Asked Questions
If you’re unsure how to work with your quad muscles, check out some of the questions people wonder about them. You’ll get the answers you need to feel confident about your next addition to your stretching routine.
How do you loosen tight quads?
Stretch your quads before and after your workouts to loosen them. You’ll feel more limber when exercising and prevent extra tightness when your quads need to recover from your latest gym trip.
What causes extremely tight quads?
Tight quads may be a result of working your thighs during a training session. It can mean that your muscles experienced the exercise-related trauma necessary to mend and build additional muscle mass.
If you experience tight quads without working out, a doctor or physical therapist can help identify other potential factors causing your discomfort.
When are quad stretches a bad idea?
Quad stretches are a bad idea when gentle movements cause noticeable discomfort. You could accidentally make your thigh pain worse by stretching them when you’re hurting. Talk with a doctor if you can’t do quad movements without significant to severe pain for accurate assessment and treatment.
Editor’s Note: The content on BarBend is meant to be informative in nature, but it should not be taken as medical advice. When starting a new training regimen and/or diet, it is always a good idea to consult with a trusted medical professional. We are not a medical resource. The opinions and articles on this site are not intended for use as diagnosis, prevention, and/or treatment of health problems. They are not substitutes for consulting a qualified medical professional.
References
Fuchs, C. J., Kuipers, R., Rombouts, J. A., Brouwers, K., Schrauwen-Hinderling, V. B., Wildberger, J. E., Verdijk, L. B., & van Loon, L. J. C. (2023). ‘Thigh muscles are more susceptible to age-related muscle loss when compared to lower leg and pelvic muscles,’ Experimental Gerontology, 175, 112159.
Lu, L., Robinson, M., Tan, Y., Goonewardena, K., Guo, X., Mareels, I., & Oetomo, D. (2020). ‘Effective assessments of a short-duration poor posture on upper limb muscle fatigue before physical exercise,’ Frontiers in Physiology, 11.
The FITT principle is a foundational concept in exercise programming. It’s straightforward and accounts for all of the necessary variables in a structured fitness plan: frequency, intensity, type, and time.
It’s a principle that personal trainers and performance coaches across all sports use to develop effective training programs for athletes and casual gymgoers alike. In this guide, you’ll learn about each element of the FITT principle and hear from certified functional strength coach and United Endurance Sports Coaching Academy (UESCA)-certified endurance coach Melissa Kendter on how to make it work for you.
Key Takeaways
The FITT principle stands for Frequency, Intensity, Time, and Type and is a way to structure your workout routine to create clear and achievable steps that support your long-term fitness goals.
Benefits of using the FITT principle include reduced burnout, injury, and exercise plateaus.
Many personal trainers and health experts use FITT as the basis for custom workout plans for people at all fitness levels.
The FITT principle is a great way to stay motivated when reaching fitness goals, with nearly 40% of people pinpointing lack of motivation as the reason they stop working out.
What Is the FITT Principle?
The FITT acronym stands for:
These four elements make up the basics of any fitness program and can be used for any activity or sport. Personal trainers and coaches can individually manipulate any of these variables to help their clients or athletes reach specific goals.
Ultimately, the goal behind the FITT principle is to safely and effectively progress from your current fitness level. More specifically, trainers alter FITT variables to:
Improve aerobic conditioning and cardiorespiratory fitness
Get stronger in a specific lift, like the deadlift or bench press
FITT can also be used in a healthcare and rehabilitation context. Providers can prescribe exercise protocols to help people overcome chronic diseases, such as high blood pressure, or recover from a musculoskeletal injury such as an ACL tear.
“When creating a program, two key factors must be considered: the specific adaptation desired and the current level of fitness and/or training age of the athlete,” says Kendter. “The great thing about these principles is that they can be used by anyone, whether they’re beginner, intermediate, or experienced,” she explains.
Frequency
Whether your sport requires prioritization of aerobic exercise (for example, marathon running) or anaerobic exercise (for example, powerlifting), frequency is going to be a key factor in your training program.
Broadly, frequency refers to how often you do something. But it can refer to more than one thing. Depending on the context and structure of your training plan, it could mean:
How often you train overall (typically defined in terms of per week)
How often you do a specific kind of exercise (like running)
How often you train a specific stimulus for a type of exercise (such as threshold run if you are a runner)
How often you perform a specific lift (like squat, bench, or deadlift)
How often you do resistance training for a particular muscle group (such as quadriceps or deltoids)
How often you train a particular movement pattern (like push or pull)
Kendter points out that beginners should focus on overall frequency (how often you train per week) before thinking about any other frequency variables. “Start with one or two days of structured training, and as you get into a habit of training consistently, you can add additional sessions and get more specific,” she says. “Consistency and forming habits around our training is key first.”
Frequency for Strength Training
If you primarily engage in strength training, frequency—for you—will refer to:
How many times you perform specific lifts (for powerlifting and Olympic lifting plans)
Frequency is the easiest variable to manipulate (add or remove training sessions), but it also has the greatest limits: You can’t train more than seven days per week. Rest days are an important part of progression.
Frequency for Cardio
For most people, cardio frequency is simply a measure of how many times they do cardio exercise each week. Manipulating this variable is as simple as doing more or fewer cardio sessions per week.
Increasing cardio sessions from one 60-minute session to three 60-minute sessions per week can lead to improved health outcomes in individuals with obesity and/or other chronic diseases. (1)(2)
For athletes, it’s a bit more complex. Athletes who rely on excellent cardiovascular fitness to compete track and change frequency for multiple stimuli, including:
Low-intensity aerobic activity (building an aerobic base)
Threshold training (pushing anaerobic/lactate threshold)
Speed training
Changing the frequency of any of these stimuli will affect an athlete’s training adaptations, thus their performance, too.
Intensity
Intensity generally refers to the level of effort output in a given session. You can measure intensity by using:
In strength training, intensity basically means “how heavy,” generally defined as a percentage of your one-rep max (1RM) for the exercise you are doing.
For example, if you’re doing squats, performing a set of two reps at 85 percent of your 1RM would be considered high-intensity. Conversely, performing a set of 12 reps at 50 percent of your 1RM would be considered low-intensity, even if your heart rate increases and your legs burn.
Heads up: Intensity is often mistaken for volume in strength training. The terms are frequently used interchangeably, but they are not the same thing. Volume refers to the total number of repetitions multiplied by sets multiplied by the weight lifted. (Example: three sets of 10 squats at 100 pounds equals 3,000 pounds.)
Intensity refers to the amount of weight itself. So, to increase intensity, increase the weight.
Notably, some research shows that high-intensity training results in greater strength gains than high-volume training, at least in individuals who already have weight training experience. (3) (4)
Intensity for Cardio
For cardio exercise, intensity is usually measured as a percentage of your maximum heart rate, as follows:
Zone 1: 50 to 60% of HRmax (very low intensity)
Zone 2: 60 to 70% of HRmax (low intensity)
Zone 3: 70 to 80% of HRmax (moderate intensity)
Zone 4: 80 to 90% of HRmax (vigorous intensity)
Zone 5: 90 to 100% of HRmax (maximal intensity)
To manage intensity levels in cardio-focused training, coaches prescribe target heart rate zones. For instance, for your weekly long run, your goal should be to stay in heart rate zones two and three. For interval training, it’s typical to reach heart rate zone five for short periods of time. A heart rate monitor, such as one on a fitness tracker, is the most practical way to monitor your heart rate while exercising.
“When altering duration, take into account the intensity of your activity,” Kendter says. “More time is not always better and can sometimes lead to overtraining. However, if you are training to improve endurance, moderate- or low-intensity exercise performed for a longer period of time will provide the results you want.”
Time for Strength Training
With strength training, measuring time against intensity can get tricky. If you are training at a very high intensity—say, 80 to 90 percent of your 1RM—you’ll need more rest in between sets. It’s common to rest up to five minutes in between sets to maximize performance on each set. So, you could end up in the gym for a long time, even though your actual time spent training is lower.
The reverse is also true. If you are training at low intensities (using light weights or your body weight), you will be able to perform more reps and sets in what seems like a shorter amount of time. But the truth is that you took less rest, so your actual training time was greater.
Time for Cardio
For cardio exercise, the time-to-intensity relationship is much more straightforward. In heart rate zone 2, for instance, you can move for hours on end. Exercising in heart rate zone 4 or 5, on the other hand, requires rest intervals after short bursts of work.
For general health, research shows that the minimum effective dose (that is: the least you can do and still see benefits) for aerobic exercise is one hour. However, additional benefits are seen with three hours of aerobic exercise per week. (1)
Type
Type is simple: It refers to the kind of training you do. Depending on your fitness goals, you may engage in more than one type of training.
CrossFit athletes, for example, must perform well in multiple fitness domains to be good at their sport. They must have speed, endurance, strength, power, agility, and gymnastics skills, and their training reflects that.
[Read More: The Best Running Workouts to Level Up Your Conditioning]
Conversely, marathon runners need to be good at one thing: running marathons. Their training protocols reflect that by prioritizing aerobic conditioning.
Type for Strength Training
In a resistance training context, type can refer to a specific sport or modality, such as:
Changing the type of training you do will change your results. Bodybuilding training is designed to maximize muscle growth, for instance, while Olympic lifting training intends to maximize strength and power in the snatch and clean-and-jerk.
Depending on your goals, choosing a type of cardio can be as simple as choosing the one that sounds most fun. If you’re simply trying to improve your cardiovascular health, doing more than one type of cardio on a regular basis can keep things interesting and fun.
For athletes, the type of cardio they do should be specific to their sport.
How to Use FITT
“Fitness isn’t just about working hard to achieve our goals, but it’s also about working smart, and that’s where the FITT principle comes into play,” Kendter says. “The FITT principle outlines key components for a structured and effective training program. Following these components to create a routine ensures the exercise you’re doing will work for you specifically.”
Here’s a quick recap on how to implement the FITT principle into your training for progressive overload:
Frequency: Add or remove training sessions to achieve the desired outcome.
Intensity: Increase or decrease the intensity depending on your goal. Lift at higher intensities, for instance, to increase strength.
Time: Change the duration of your sessions based on goals and intensities.
Type: Alter the type of exercise you do to elicit specific adaptations. For example, run more to become a better runner.
Frequently Asked Questions
How much physical activity do adults need?
The minimum recommendation is 150 minutes (2.5 hours) of low-to-moderate-intensity cardiovascular exercise, such as walking, per week, plus two days of muscle-building activity. The benefits of exercise increase with the dose to a certain point; more exercise is better for most people, though it’s important to manage your risk of injury by including rest days.
What kinds of sessions are focused on cardiovascular activity and which are focused on muscular strength?
What adjustments can be made to a workout if progress plateaus, according to the FITT principle?
Using the FITT principle, you can manipulate the frequency, intensity, time, or type of exercise to break through a plateau. Practically, this can look like going from two to three training sessions per week; increasing the weight for various strength exercises; increasing the duration of a weekly walk or run; or incorporating a new type of exercise.
Can the FITT principle be used to create a workout plan for weight loss?
Absolutely. The FITT principle is an excellent framework for creating workout plans focused on weight loss. By manipulating any of the four variables (frequency, intensity, time, or type), the exerciser can work past weight loss plateaus and increase fitness.
What adjustments to the FITT principle should be made for older adults?
The FITT principle should be customized to the individual, accounting for current health conditions and past injuries. For instance, someone with high blood pressure should likely not lift weights to near-maximal effort levels, as blood pressure increases with high-intensity resistance exercise; and someone with osteoporosis may generally avoid contact sports, but engage in weight-bearing exercise such as walking and weight training to minimize bone density loss. Check in with a qualified healthcare professional for personalized recommendations.
Editor’s Note: The content on BarBend is meant to be informative in nature, but it should not be taken as medical advice. When starting a new training regimen and/or diet, it is always a good idea to consult with a trusted medical professional. We are not a medical resource. The opinions and articles on this site are not intended for use as diagnosis, prevention, and/or treatment of health problems. They are not substitutes for consulting a qualified medical professional.
References
Coleman CJ, McDonough DJ, Pope ZC, Pope CA. Dose-response association of aerobic and muscle-strengthening physical activity with mortality: a national cohort study of 416 420 US adults. Br J Sports Med. 2022;8.
Pinckard K, Baskin KK, Stanford KI. Effects of Exercise to Improve Cardiovascular Health. Front Cardiovasc Med. 2019;6:69.
Mangine GT, Hoffman JR, Gonzalez AM, et al. The effect of training volume and intensity on improvements in muscular strength and size in resistance-trained men. Physiol Rep. 2015;3(8):e12472.
Giessing J, Eichmann B, Steele J, Fisher J. A comparison of low volume ‘high-intensity-training’ and high volume traditional resistance training methods on muscular performance, body composition, and subjective assessments of training. Biol Sport. 2016;33(3):241-249.
Stöggl TL, Sperlich B. The training intensity distribution among well-trained and elite endurance athletes. Front Physiol. 2015;6:295.
Festa L, Tarperi C, Skroce K, La Torre A, Schena F. Effects of Different Training Intensity Distribution in Recreational Runners. Front Sports Act Living. 2020;1:70.
Have you ever felt a dull or stabbing pain in the front of your lower leg after running? (Or worse, in the middle of that 5K training?) Perhaps you’ve been running a particularly long run or maybe your run has taken you onto an unstable or hard surface like sand or gravel. Chances are—you may be experiencing spin splints.
Shin splints are a common condition among runners. A 2014 study found that among military recruits, runners, and dancers, between four to 35 percent experience shin splints, with distance runners being the largest group. (1)
So what causes shin splints and how do you get rid of them? Great questions! Keep reading to find out. You’ll learn how to do the best shin splint stretches and get insight into these aches and pains from Dr. Matt Szymanski, DPT, a performance physical therapist who specializes in treating athletes of all kinds.
The shin splint pain you’re experiencing may be caused by tightness in your calves, so stretching your calves out is a great way to alleviate your pain. (2) The parts of your lower legs work together so that if your calves are tight on the back of your leg, your shins in the front won’t be able to work optimally. This stretch targets your calves to help release the tightness in your shins.
How to Do It:
Stand facing a wall with one foot forward and one foot back.
Place your hands flat on the wall for support.
Bend your front knee while keeping both feet flat on the ground.
Keep the back leg straight and the heel on the ground.
Lean into the wall until you feel a stretch in your calf muscle.
Hold for 10-15 seconds per leg.
Modifications
Make it Easier: Move your body closer to the wall to take some pressure off your calves.
Make it Harder: Step further away from the wall with your back foot creating more distance between your feet. This will allow you to get a deeper stretch in your calves.
Coach’s Tip: Keep your arms engaged—but not locked out—and press your bodyweight into the wall to feel the full stretch in your calves.
This shin splint exercise strengthens your lower leg muscles and improves balance, which can help prevent shin splints by promoting proper alignment and stability. This is a great stretch for your shins and it also challenges ankle stability, which will help strengthen and support your lower body. This allows your lower body to function properly as a whole.
How to Do It:
Stand up straight with your chest lifted, core engaged, and feet shoulder-width apart.
Bring one leg up and balance on one foot while maintaining good posture.
Lean forward on your grounded foot until the end point of control (before your heel starts to rise).
Dig your toes and the heel of your grounded foot into the ground and hold for five to 10 seconds.
Return your lifted foot down to the starting position with control.
Repeat on the opposite leg.
Modifications
Make it Easier: If you feel unstable, use a wall for support.
Make it Harder: Add a rotation in the exercise by twisting at your hips, not your torso.
Coach’s Tip: Keep your body straight to get the most out of this exercise—hips neutral and knees straight. You should not hinge forward like in a deadlift.
3. Calf Stretch with Deficit
Equipment Needed
A step or elevated surface; something sturdy to hold onto
Muscles Worked
Gastrocnemius, soleus, Achilles tendon
Sets & Reps
5 x 10-15 seconds
This is a great Achilles tendon and calf stretch. When your Achilles tendon is tight, its ability to absorb shock effectively may be limited, especially in high-impact exercises like running. Shock absorption is essential for safely managing the impact of your foot hitting the pavement with each stride. If your Achilles tendon is tight, your shins could overcompensate and take on additional stress.
How to Do It:
Stand on a step or an elevated surface with the balls of your feet on the edge and your heels hanging off.
Hold onto a sturdy surface like a column or railing.
Allow your heels to sink below the level of the step to deepen the stretch in your calves.
Hold for 10 to 15 seconds.
Lift your heels back to neutral to relax before beginning the next rep.
Modifications
Make it Easier: If you don’t have an elevated surface to set your heels on, you can perform this stretch on the ground by bringing one foot in front of the other and bending forward toward your front leg. Lift your toes to feel the stretch in your calves.
Make it Harder: Perform this stretch with one leg at a time to get an isolated stretch on each side.
Coach’s Tip: Holding onto something allows you to focus on feeling the stretch in your calves and Achilles tendon without letting your balance get in the way.
4. Kneeling Shin Stretch
Equipment Needed
None
Muscles Worked
Tibialis anterior
Sets & Reps
5 x 10-15 seconds
This stretch relieves tension in your tibialis anterior, which can help alleviate pain in your shins directly. However, you need good knee flexion to do it. If you find that sitting in this position hurts your knees, perform this stretch standing instead.
How to Do It:
Kneel on the ground with your toes pointed behind you.
Sit back on your heels and sit up straight with your core engaged.
Hold for 10 to 15 seconds.
Modifications
Make it Easier: Perform this stretch standing by bringing one foot back with your toes pointed behind you and resting the top side on the ground.
Make it Harder: Put your body weight into your arms and the tops of your feet and press your knees and shins off the ground to get an extra stretch. Hold for 10 to 15 seconds before returning your shins and knees down to the floor.
Coach’s Tip: Pointing your toes to elongate them will ensure that you get the best stretch in your tibialis anterior, but be careful not to dig your toes into the ground.
5. Yoga Strap Shin Stretch
Equipment Needed
Yoga strap or towel
Muscles Worked
Tibialis anterior, gastrocnemius, soleus
Sets & Reps
4 sets for 10-15 seconds
[Read More: The Best Leg Stretches to Bolster Your Lower Body Training]
Practicing this stretch helps with ankle mobility and helps alleviate tension in your calves and shins. Imbalances between the front and back of your leg can contribute to shin splints. Stretching your calves helps maintain muscle symmetry and reduces the risk of injury associated with shin splints.
How to Do It:
Sit on the floor with your knees straight and legs extended in front of you.
Loop a yoga strap (or towel) around the balls of your feet and hold the ends of the strap in your hands.
Keep your knees straight and pull your arms into your sides until you feel a stretch in your lower leg muscles.
Hold for 10 to 15 seconds.
Modifications
Make it Easier: Instead of using a yoga strap, lean forward reaching toward your toes and point your toes toward your hands.
Make it Harder: Lie on your back and lift one leg looped around the yoga strap in the air. Keep your knee straight as you pull the straps toward you the same way until you feel a stretch in your lower leg.
Coach’s Tip: Sit up tall with your spine neutral and core engaged to get the most out of the stretch.
This is a great stretch for your lower leg muscles and is particularly helpful for working on ankle mobility. Limited ankle mobility can exacerbate shin splints by altering your running mechanics, leading to increased stress on your shins. Working on ankle mobility helps you run with proper form and helps prevent further injury.
How to Do It:
Kneel on one knee with your opposite foot on the ground next to your bent knee.
Lean forward towards your knees while keeping your one foot flat on the ground.
Keep leaning forward until you feel your heel is about to rise.
Hold for 10 to 15 seconds.
Switch legs and perform on the opposite side.
Modifications
Make it Easier: Perform the stretch standing with your front leg on an elevated surface about two feet or so off the ground.
Make it Harder: Lean further forward to increase the intensity of the stretch.
Coach’s Tip: Squeeze your toes and heel into the ground at the end range of motion to get the best stretch.
7. Foam Rolling Calves
Equipment Needed
Foam roller
Muscles Worked
Gastrocnemius, soleus
Sets & Reps
2-5 minutes per leg
Myofascial release, or foam rolling, is not technically a stretch, but it helps relieve tension and tightness in your calf muscles and connective tissues in your lower leg. This promotes muscle relaxation and reduces discomfort associated with shin splints. Foam rolling your calves helps with mobility and reduces inflammation.
How to Do It:
Sit on the floor with a foam roller under your calves.
Place your hands on either side of your body a little wider than shoulder-width apart.
Put your weight into the palms of your hands as you lift your butt off the ground.
Roll up and down the length of your calves.
Breathe through any resistance and focus on any area where you feel knots.
Modifications
Make it Easier: Instead of pressing up through the ground and lifting your body, remain seated on the ground and rotate your legs left to right on the foam roller.
Make it Harder: Use a lacrosse ball and focus on one leg at a time to isolate each calf.
Coach’s Tip: Placing your arms further than shoulder-width apart allows for greater stability and control.
Sample Shin Splint Stretch Workout
Stretching before and after your workout is essential in ensuring that your workout and recovery are effective. Properly warming up allows you to engage the muscles you will be using in your workout. This helps stave off potential injury and improves performance by allowing you to work out with excellent form.
The Warm-Up
Adding a balanced stretching routine into your fitness routine can be the key to unlocking your fitness goals. These stretches target the muscles in your lower legs and promote flexibility, strength, and stability. Incorporating these stretches into your routine can improve your overall performance, help reduce your risk of injury, and potentially alleviate shin splint pain.
To maximize the effectiveness of this warm-up, remember to perform each stretch with proper form and technique. Take your time with each exercise and focus on engaging and connecting to your muscles. This will make your warm-up more effective, allowing you to run injury-free.
Single Leg Woodpecker:2 x 5 per side, hold for 5-10 seconds
Calf Stretch with Deficit:5 x 10-15 seconds
Kneeling Shin Stretch:5 x 10-15 seconds
Yoga Strap Shin Stretch: 4 sets for 10-15 seconds
Combat Stretch:4x 10-15 seconds per leg
Foam Rolling Calves: 2-5 minutes per leg
Equipment Needed: A wall or sturdy surface, a step or elevated surface, a yoga strap or towel, and a foam roller.
Modifications
Make it Easier: Pick only a few stretches to focus on so you can perfect each stretch individually.
Make it Harder: Rather than holding each stretch, make the warm-up dynamic by moving through each stretch. More fluidly.
What Are Shin Splints?
Shin splints, medically known as medial tibial stress syndrome (MTSS), is a common exercise-related condition where you feel pain along the inner edge of your shinbone often caused by inflammation after performing repetitive high-impact activities like running or jumping.
Dr. Matt Szymanski, DPT, says it’s tricky to define what shin splints are because it’s an “umbrella term that refers to pain in the lower leg that is typically caused by high-impact sports or exercise.”
For runners, there are two main reasons you may experience the sensation of shin splints. The first is overtraining, especially when you suddenly increase the length or frequency of your runs without proper conditioning. If your muscles are not equipped to handle the increase in intensity, you may find yourself with shin splints.
The second is poor technique. According to Szymanski, “Running is a skill that needs to be developed just like a squat or a golf swing. It’s super easy to slip on a pair of shoes, head out the door, and pound the pavement for 30 to 60 minutes. But if you don’t know how to run well…that’s a recipe for pain.”
Stretching your lower legs may provide tremendous relief. If you’re experiencing shin splints, try some of these stretches to help ease your discomfort (and check in with a physical therapist).
Anatomy of the Shins
Here are the ins and outs of the fronts of your lower legs.
Tibialis anterior: The tibialis anterior is the muscle at the front of your shin bone (tibia) and is responsible for dorsiflexion (raising your foot upwards toward your shin) and inversion (turning your foot towards the inside of your body to face your other foot). It also helps with balance and stability.
Gastrocnemius: The gastrocnemius is the larger of the two calf muscles and it primarily flexes (extends) your foot at the ankle joint and assists in flexing your leg at the knee joint. Think of a ballerina on point– that’s flexion.
Soleus: The soleus is found underneath your gastrocnemius and primarily flexes your foot.
Benefits of Stretching With Shin Splints
Taking the time to stretch your lower legs has been shown to help manage shin splints. (3) Stretching might not get to the root cause of your shin splints, but it can be a short-term shin splint treatment that can alleviate pain and help aid your recovery. Keep reading to find out how stretching with shin splints can benefit you.
It Can Improve Flexibility
Studies demonstrate that stretching can help improve flexibility. (4) This enhances your range of motion. The more flexibility in your calves, shins, and ankles, the more you can run on a variety of surfaces with ease and proper form.
It May Help Alleviate Pain
Shin splint pain often results from overuse or repetitive stress on your muscles and connective tissues in the lower leg.
Stretching helps relax these muscles, releasing tension and reducing soreness. Studies have shown that stretching for 10 minutes twice a day can reduce delayed onset muscle soreness and inflammation caused by tight muscles. (5)
It May Speed Up Recovery
Incorporating stretching into your rehabilitation program can speed up your recovery by reducing the tension and pain in your lower legs. Stretching also increases blood flow to the stretched area, which allows for better circulation. This can help accelerate your recovery time, allowing you to heal faster and get back to running quicker. (6)
Frequently Asked Questions
Can stretching get rid of shin splints?
Stretching can be highly beneficial in the short term for shin splints, but it does not get to the root cause of why you are experiencing them in the first place. If possible, Szymanski recommends that you modify the activity causing your shin splints for a while so that you can address the underlying issues and work to fully eliminate your shin splints. So, runners—this is a good time to take a break.
How do you get rid of shin splints?
Treating shin splints is more involved than simply stretching the pain away. First, make sure you have the right equipment. Switch out your running shoes every 300 to 500 miles or every six months. Orthopedic insoles or inserts are also an option if you have flat feet and your arch needs more support.
Cross-training will also help balance your routine, especially if your shin splints are caused by performing one exercise repeatedly, like running. Adding some variety to your workout can help relieve your overworked muscles. Sometimes shin splints are caused by weak muscles, so building muscle can alleviate your pain and support your legs by making them stronger.
If you’ve noticed that your shin splints are a recurring issue and not going away, seek out physical therapy or an expert in sports medicine to determine the root cause. They can help find a more permanent solution.
Is it OK to push through shin splints?
Because shin splints are a common overuse injury, you shouldn’t push through physical activity. Pushing through shin splints could cause further injury like a stress fracture. Instead, substitute the painful exercises with low-impact cardio like biking or swimming until the pain subsides, before slowly reintroducing it.
When should I see my healthcare provider?
Szymanski says, “If you have removed the offending activity and modified your training for four weeks and it comes right back after you start to add in running or your sport again, it’s time to see someone.” A physical therapist or qualified healthcare professional can help get to the source of your lower leg pain and help make adjustments to get rid of your shin splints for good.
Editor’s Note: The content on BarBend is meant to be informative in nature, but it should not be taken as medical advice. When starting a new training regimen and/or diet, it is always a good idea to consult with a trusted medical professional. We are not a medical resource. The opinions and articles on this site are not intended for use as diagnosis, prevention, and/or treatment of health problems. They are not substitutes for consulting a qualified medical professional.
References
Reshef N, Guelich DR. Medial tibial stress syndrome. Clin Sports Med. 2012;31(2):273-290.
Loudon JK, Dolphino MR. Use of foot orthoses and calf stretching for individuals with medial tibial stress syndrome. Foot Ankle Spec. 2010;3(1):15-20.
Curr Rev Musculoskelet Med. 2009 Sep; 2(3): 127–133. Published online 2009 Oct 7.
Berrueta L, Muñoz-Vergara D, Martin D, et al. Effect of stretching on inflammation in a subcutaneous carrageenan mouse model analyzed at single-cell resolution. J Cell Physiol. 2023;238(12):2778-2793.
Cureus. 2023 Jan; 15(1): e33905. Published online 2023 Jan 18.
“It looks goofy but it works,” says Dr. Mike Israetel.
Last updated on June 7th, 2024
Let’s be real; nobody has big enough biceps. We’re all aiming to be Arnold Schwarzenegger in one way or another. On Jun. 4, Dr. Mike Israetel of Renaissance Periodization and bodybuilder Jared Feather teamed up to explain and demonstrate the single best exercise for creating hypertrophy in stubborn biceps.
If you’re bored to death of barbell curls and feel like you need to spice up your arm workouts, this one is for you.
We’re going to break down Israetel’s rationale and teach you how to perform the TK with picture-perfect technique so your biceps can go from “stubborn” to “spectacular”.
The Best Exercise for Stubborn Biceps
“This exercise will give you multiple days of delayed-onset muscle soreness,” Israetel claims. Tall order, but we’re here for it — according to Dr. Israetel, the single best exercise for growing stubborn biceps is the lying dumbbell biceps curl.
How To Do It
Equipment Needed
Weight bench, dumbbells
Muscles Worked
Biceps
Sets & Reps
3 x 8-12
Lie on your back on a flat bench with a dumbbell in each hand and your arms hanging off the sides, but not down so far that the weights rest on the floor.
You may want to elevate the seat of the bench, if possible, to give your head some support.
Curl the weights up by flexing your elbows until your forearms point toward the ceiling.
From the Expert: “You need to lower the weights slowly and under control because of the position this exercise puts your shoulders in,” Israetel notes. This movement requires a decent degree of shoulder extension — you may feel a significant stretch in your front deltoids and chest muscles.
Modifications: Israetel recommends holding your upper arms a bit higher if you’re experiencing shoulder pain during this exercise. Try tucking them snugly against your torso. There are also a number of similar movements that stress the biceps in a similar fashion if the supine dumbbell curl isn’t your cup of tea:
Both of these exercises involve applying maximal tension to the biceps when they’re fully or nearly fully lengthened.
Israetel and Feather are hopping aboard the long-length partial train in a big way with this unique biceps curl variation. The premise to this movement is simple; use a dumbbell to apply as much mechanical tension as possible to the biceps when they’re almost fully stretched out. Why?
Studies on hypertrophy repeatedly show that mechanical tension, or how much torque you’re putting on the joint, is integral for muscle growth. (1)
Further, a growing body of research on lengthened partials seems to suggest that applying mechanical tension to a muscle while it is stretched is more conducive to growth than when the muscle is shortened. (2)(3)
The lying dumbbell biceps curl leans into these elements in a big way. Free weights like dumbbells work against gravity, and tend to have inconsistent resistance curves as a result.
You’ll often find dumbbell exercises like the lateral raise very easy to begin with and very difficult to finish. This biceps curl variation puts all that tension on your arms while they’re stretched, doubling down on the growth potential.
More Bodybuilding News
References
Schoenfeld B. J. (2010). The mechanisms of muscle hypertrophy and their application to resistance training. Journal of strength and conditioning research, 24(10), 2857–2872.
Pedrosa, G. F., Simões, M. G., Figueiredo, M. O. C., Lacerda, L. T., Schoenfeld, B. J., Lima, F. V., Chagas, M. H., & Diniz, R. C. R. (2023). Training in the Initial Range of Motion Promotes Greater Muscle Adaptations Than at Final in the Arm Curl. Sports (Basel, Switzerland), 11(2), 39.
Kassiano, W., Costa, B., Kunevaliki, G., Soares, D., Zacarias, G., Manske, I., Takaki, Y., Ruggiero, M. F., Stavinski, N., Francsuel, J., Tricoli, I., Carneiro, M. A. S., & Cyrino, E. S. (2023). Greater Gastrocnemius Muscle Hypertrophy After Partial Range of Motion Training Performed at Long Muscle Lengths. Journal of strength and conditioning research, 37(9), 1746–1753.
Featured Image: Renaissance Periodization / YouTube
When was the last time somebody asked you how much you can bench press? For some gym rats, being asked that question is like Christmas — an opportunity to flex the results you’ve achieved from all your chest workouts.
But what if your bench press max isn’t up to snuff? Sure, you might just need a new bench press program. Or, you could follow the findings of a March 2024 study published in the Journal of Strength and Conditioning Research. Spoiler: You can make one simple adjustment to your bench press technique and probably set a new personal record right away.
We’re going to unpack the findings of this paper, discuss their applications and limitations, and give you a crash course on proper bench press technique so you can bump up that 1-rep max.
About the Expert
This article was written by BarBend Senior Writer Jake Dickson. Dickson holds a Bachelor of Science degree in Exercise Science and is a National Academy of Sports Medicine (NASM) personal trainer.
What the Study Says
The paper in question is titled “Flat-Back vs. Arched-Back Bench Press: Examining the Different Techniques Performed by Power Athletes” by Bartolomei & colleagues, who examined the performance effects of deliberate spinal arching during the barbell bench press exercise. (1)
Notably, the authors cite a 2023 rule change put forth by the International Powerlifting Federation (IPF) which banned excessive back arching and imposed a “depth” requirement to the bench press in powerlifting meets.
Methods
The study followed 15 experienced strength training enthusiasts over the course of three different bench press workouts.
Participants were experienced weight lifters who had an average 1-rep max bench of 1.38 times their own body weights.
Athletes performed a 1-rep max bench press test at the beginning of the evaluation period, with either a flat or arched back, in a randomized order.
They then performed a subsequent bench workout at a later date utilizing the opposite technique from the previous test.
The third workout consisted of multiple 2-rep-max tests at different percentages of their true maxes.
Participants were assessed on various metrics, including maximal strength, bar velocity, and EMG activation of the chest muscles.
Benching with an arched back added 4.2 kilograms or 9.25 pounds to the 1-rep max of each participant on average.
Barbell velocity was higher on the flat-backed bench press.
Both the flat and arched bench presses elicited similar muscle activation in the chest, though triceps activation was higher when benching with an arch.
Limitations: No study is infallible. While this study was well-designed, one limitation is in the small number of participants does weaken the validity of the data. It’s also unclear if the participants adhered strictly to current IPF bench press technical rules regarding setup and technique.
What You Should Do: This study essentially argues in favor of using a spinal arch when benching, as it can help you increase strength without harming other benefits such as chest hypertrophy.
Nailing your bench setup is only one piece of the puzzle. We now have solid evidence that using an arch could potentially add up to 10 pounds to your bench, but you still need to make sure you’re executing the other elements of proper bench press technique as well as you can.
Lie on your back with your feet planted firmly on the floor or tucked back with your heels off the ground.
Ensure that the barbell is directly above (or slightly behind) your eye line and over your forehead.
Grip the bar with a shoulder-width or slightly wider overhand grip.
Gently pull your torso off the bench while keeping your butt on the pad, pinch your shoulders back, and lay your upper back down on the bench.
Ensure that you have an arched spine, with a few inches of space between your lower back and the bench, and that your shoulder blades are locked into position.
Unrack the bar (with the assistance of a spotter if you’re lifting heavy) and suspend it directly above your shoulders with your elbows locked out.
Inhale and lower the bar down and forward until it touches the highest part of your torso, right around your sternum.
Keep your butt on the bench and press the bar up and back until it returns to the starting position above your shoulders with your elbows locked out.
Coach’s Tip: Recruit a spotter to help take the bar off the rack if you’re maxing out. A “lift-off” will ensure you keep your shoulders pinned and can maintain your arch while getting the bar into the correct starting position.
More Fitness Research on BarBend
References
Bartolomei S, Caroli E, Coloretti V, Rosaci G, Cortesi M, Coratella G. Flat-Back vs. Arched-Back Bench Press: Examining the Different Techniques Performed by Power Athletes. J Strength Cond Res. 2024 Mar 29. doi: 10.1519/JSC.0000000000004778. Epub ahead of print. PMID: 38551927.
Thirteen Women’s Physique athletes will grace the stage at the 2024 Omaha Pro Women’s Physique show in Omaha, NE, on Saturday, June 8, 2024. Those athletes will face the fans and judges hoping to win and earn qualification to the Women’s Physique Olympia, a part of the 2024 Olympia Weekend in Las Vegas, NV, on Oct. 10-13, 2024.
Russia’s Natalia Bystrova is uniquely positioned because she has already qualified for the Olympia, thanks to scoring gold at the 2024 Optimum Classic Pro in Shreveport, LA, on May 25, 2024. If she wins this show, no Olympia qualification will be issued.
If Bystova does not stand atop the podium, her Olympia spot remains secure. She has nothing to lose but can gain momentum by winning two pro shows in a row.
Susan Graham
Susan Graham finished second to Bystrova in the Optimum Classic Pro and is prepared for their rematch. Graham is a Masters competitor and placed fifth at the 2023 Masters Olympia. She has been posing in the pro ranks since the division was launched in 2013.
Winsome White
Winsome White placed ninth in the 2022 Women’s Physique Olympia but did not qualify for the 2023 Olympia. The Omaha Pro is her 2024 season debut. She ranked fourth in this contest in 2021, her rookie season. Her most recent pro win was at the 2022 Lenda Murray Savannah Pro.
Other Notes
This is one of two Women’s Physique pro shows this weekend. The other is at the 2024 Toronto Pro Supershow in Toronto, ON, Canada. The winner qualifies for the 2024 Olympia if not already qualified.